Category Archives: Fun with Kids

Rainy Day Cookie Picnic

Last week, as we got closer to the end of January, it felt like Little Man and I hadn’t been outside for any run around time in forever.  Having grown up in a semi-arid desert, I still tend to be a bit cat-like going outside in the rain.  Meaning it’s not my favorite thing.  This day, however, I had had enough.  It wasn’t raining (yet) so I bundled Little Man and myself up, grabbed his scooter and my bag full of empty egg cartons and headed off into the drizzle.

As we started off down the road, Little Man scooted alongside of me and commented that there was an awful lot of drizzle.  It had, in fact, turned from drizzle into a light rain.  By the time we’d made it up the hill to the house with the egg stand outside their fence, the light rain was a little less light.

Around this time Little Man started asking for a snack and I told him that we could have the cookies I’d brought with me for a snack when we got down the other side of the hill to the little lake.  He thought that was a great idea and declared that we would have a cookie picnic in the rain.  So empty egg cartons deposited, and new full egg cartons retrieved ($3/dozen for local farm fresh eggs… yup!  No need for eggs from the more… questionable sources of the mega stores for us), we were off down the road again.

Little Man imagined that we were going over a waterfall as we walked downhill, tracking whatever villain was supposedly rampant that day.  We had also picked up our neighbor’s friendly dog for the walk.  She often chaperoned us on our walks in the neighborhood, and Little Man considers her to be his dog.  Or at least a dog on loan when we go for walks.

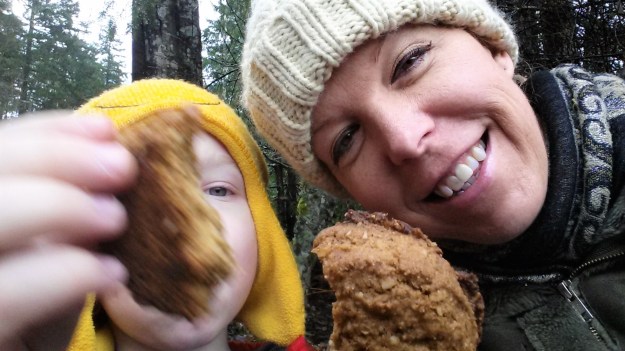
Finally at the little lake, we sat down on a tree trunk bent into a perfect bench for the two of us, water soaking into our pants but neither of us cared.  Then cookies in hand, we sat on our sodden tree, gazed at the water falling into the lake, and chatted about camping thoughts for when the weather warms up a bit.  For this mom, it was a perfect rainy day cookie picnic.

20160127_115650 (2)

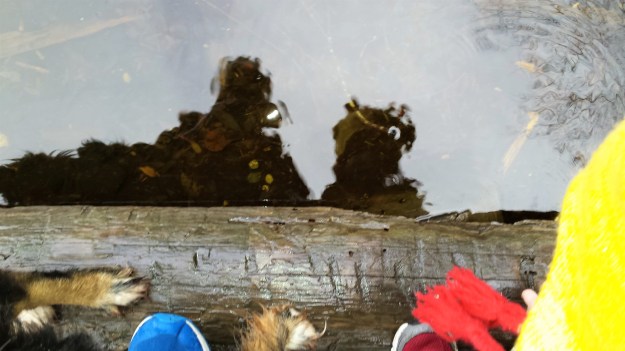
Our selfie reflection in the lake.  I love seeing Little Man’s Pooh Bear head and the dog paws on the dock as well.

20160127_115124 (2)

Our Rainy Day Cookie picnic.  A toque goes a long way to making it OK to sit out in the rain.  🙂

Breakfast Snack Cookies

Somewhere along the way we developed a morning routine of Little Man waking up and heading to the couch for a little TV, a drink of juice and a snack to tide him over until breakfast.  I don’t mind this window of quiet since it buys us a bit of time to start moving (and thinking).  Neither Dave nor I are particularly quick or quick witted first thing. What I’ve tried to do for these morning snacks, is find something that still registers as a treat for him, but that I can feel good about giving him to eat.  For Little Man, the greatest treat in the world is a cookie so treats in that form are generally a big hit.  Then I just wanted to make one that was as choc full of goodness (and tastiness) as I could come up with.  Enter the Oatmeal Peanut Butter Snack Cookie.

Once you move beyond the fact that they are delicious, they are also wheat-free, vegan and low FODMAP compliant, though none of those labels sound particularly tasty.  So if you’re going just for taste, ignore those last few disclaimers and get ready for a deliciously chewy cookie that you can feel good about feeding your family for breakfast or snack… or for treating yourself to as well.

With these, or pretty much any kind of cookies, I like to bake off a dozen right away for snacking and then freeze the rest in logs for slice and bake cookies.  For one thing that keeps me from eating an entire plate of cookies immediately since I don’t have a massive pile of cookies in front of me, but it also lets me vary things for Little Man in the mornings for snack time.  One of the things I read while researching Little Man’s dietary issues, is that especially if you have a picky eater, you should never serve your child the same thing two days in a row for breakfast.  Since Little Man is a picky eater and has the dietary issues, it felt like we were only feeding him two different foods for breakfast.  So now I try to have 4-5 breakfasts that I cycle through on any given week.  For us that’s often pancakes, eggs/toast/bacon, waffles, baked oatmeal, french toast, and a Dutch apple baby (baked pancake).  This is also why I like to keep homemade frozen pancakes, waffles, and bread in my freezer.  I make a batch of something and then freeze a good amount of it for use later in the week.  It’s not a perfect system, but it lets me rotate things through for Little Man and hopefully keeps his taste buds ready for new things to try.  FIngers crossed…

Oatmeal Peanut Butter Snack Cookies
I love that I can give these cookies to my son without feeling guilty about the ingredients, and the fact that he loves them because they’re delicious. Loaded with oats and peanut butter, these cookies give a good boost of fiber and protein, as well as a bit of chia goodness to round things out. I like to bake off a dozen and then freeze the rest of the dough in logs so I can bake more  whenever I want. Just add 5 minutes to the baking time if baking from frozen.

Ingredients:
2 tsp. chia meal (see note*)
2 tbsp. water (plus ½ cup for use later on)
¼ cup margarine, softened
1 cup creamy peanut butter
½ cup brown sugar
1 tsp. vanilla extract
3 cups rolled oats (not instant)
1 ¼ tsp. baking soda
1 cup semisweet chocolate chips

Directions:

  1. Preheat your oven to 350°, and line a baking sheet with parchment paper.
  2. In a small bowl combine the chia meal and the water, and let it sit for 5 minutes. This becomes your chia egg (aka egg replacement).
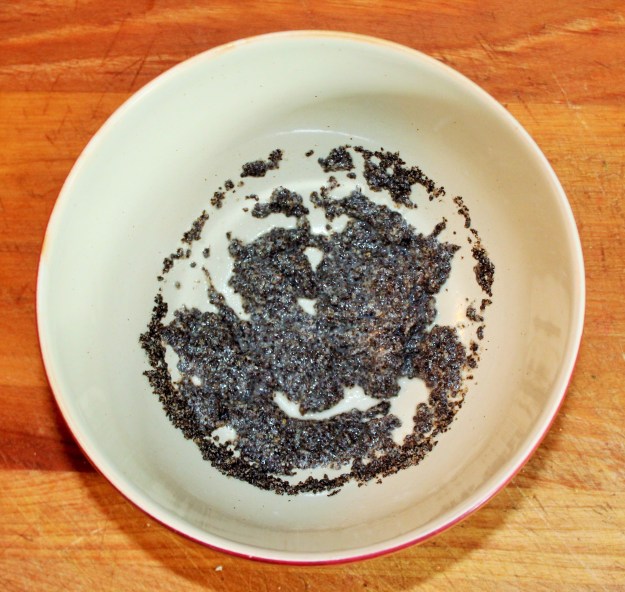
    IMG_3923

    All you need to make your own chia meal is a bag of chia seeds and a coffee/spice grinder.  This lets you create a healthier chia meal since your freshly ground meal retains more of the essential oils.  Store bought chia meal is much older and the oils have started to dissipate.

    IMG_3926

    It may not be pretty, but this peppery-gray goo (aka egg replacer) is full of nutrients, and helps wheat-free recipes hold together.

  3. In a large bowl or stand mixer, beat the margarine and peanut butter until fluffy. Add the chia egg, brown sugar and vanilla and beat until combined.
    IMG_3927

    Getting the margarine and peanut butter ready.  I use a good quality soy-free margarine.

    IMG_3928

    The beaters make fast work of blending my ingredients together, but you can do this by hand or with a stand mixer depending on your “tool” of choice.

    IMG_3930

    These are the last ingredients for using the beaters (or stand mixer).  From here on out you will want to use a spoon to combine the remaining ingredients.

    IMG_3931

    And here is your lovely batter, ready for the best parts… the oats and chocolate chips.

  4. Add the water, oats and baking soda, stirring by hand with a spoon or mixing on a lower speed in a stand mixer so the oats do not get too broken up.
    IMG_3933 (2)

    I like to stir this part by hand with a spoon so the oats do not get too broken up.

    IMG_3935

    Just missing the chocolate.

  5. Stir in the chocolate chips, and use two spoons to portion and drop tablespoon sized dough balls onto the parchment lined baking sheet, about 2 inches apart.
    IMG_3939

    This is Little Man’s favorite part since he needs to play Quality Inspector and make sure that the chocolate is fit for people to eat.

    IMG_3941

    Since this is an egg-free batter, the raw dough is safe for snacking on.  Little Man is not generally lucky enough for this, however, since I like to keep as much batter for cookies as possible.

    IMG_3943

    I did not use a scoop to form these cookies, just the old-fashioned method of two teaspoons.  If you do use a scoop, press down on the center a bit to flatten the cookies so that they cook through well.  This batter does not spread like some others do.

    IMG_3945

    More cookie love.

  6. Bake the cookies for 10 minutes, then allow to cool on the baking sheet for five minutes. Remove the cookies to a cooling rack and cool completely (of course, you should munch on a couple while they are still warm… just to make sure they are good). These cookies tend to be more fragile than cookies with lots of flour, but their taste makes up for any potential fragility.

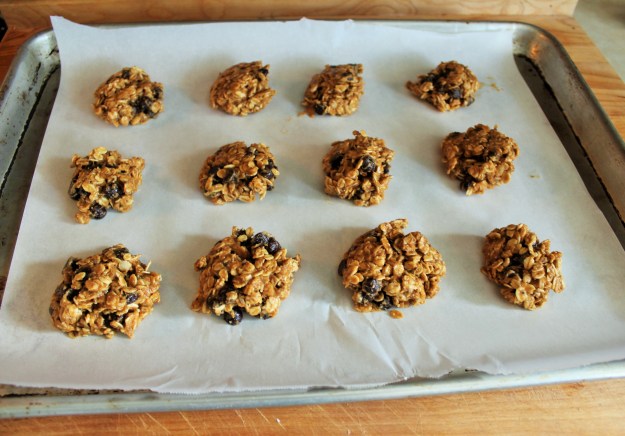
    IMG_3955

    Since there is no flour in this recipe the cookies can be a bit fragile.  Let them sit on the tray for 5 minutes before transferring them to a rack to cool completely.

  7. The dough can also be rolled into a log inside plastic wrap and frozen for slice and bake cookies. When you want the cookies, simply pull out a log, unwrap the portion you want, slice off cookies and place them on a parchment paper lined baking sheet. Bake at 350° and check after 10 minutes. They may need a couple of minutes more since they are baking from frozen. Enjoy!
    IMG_3946

    I like to bake off a dozen of the cookies fresh, and then save the rest of the batter as freezer rolls to bake whenever I want them. So start with a sheet of plastic wrap and dump a portion of the batter onto the center of the plastic.

    IMG_3947

    Form the batter into a log-like shape using the sides of the plastic.

    IMG_3950

    Don’t feel that you have to be too precious about the thing and roll the perfect log.  No one is looking, so if your cookie log isn’t perfect it is no big deal.  And if anyone wants to critique your cookie log shape… perhaps they are not worthy of your cookies.  Just a thought.  😉

    IMG_3953

    Sometimes the cookie logs do not last long enough in the fridge or freezer for me to label them.

    IMG_3955

    The finished beauties.

IMG_3957 (2)

Now I just need a cup of tea and I will declare it snack time.


Note
: Chia seeds lose their awesome oils quickly once ground, so try not to buy them pre-ground as chia meal. Make your own chia meal by blitzing up chia seeds in a coffee grinder or food processor. You can also do the same with flax seeds, or make oat flour by blitzing up whole oats (not instant, please). Store any extra chia meal in the freezer to keep it fresh.

Click here for a printable version of the Oatmeal Peanut Butter Snack Cookies recipe.

Adventures with FODMAPs – Polyols and Sweet Potato “Fries”

We’ve finally made it through the initial eight weeks of the FODMAP diet so we can begin trying to reintroduce different categories of FODMAPs into Little Man’s and our diets.  Whew!  It’s been a bit of a haul, and honestly it’s likely been closer to 10 weeks because we completely botched the first week or two.  After that point we got into the swing of things and started seeing really great improvements in Little Man’s health.  Now we get to start trying out foods, one category at a time, checking for reactions to each one, slowly going through multiple foods from each category before moving on.  Let the games begin…

For more specifics on the FODMAP diet and reintroducing foods, please see Sue Shepard’s Complete FODMAP Diet book.  This details the tests they ran to create the diet, the types of issues that following the diet can help, a detailed discussion of FODMAPS, foods to avoid and how to reintroduce foods for these “challenges” to see what reacts badly with an individual and what can be safely eaten.  I do not attempt to be an expert on this diet, but simply am doing my best to follow the guidelines to help my family’s health.

Shepard recommends starting the reintroductions with the Polyol FODMAP category, moving slowly through up the scale of contentious other categories, and finally ending with the one that no one can actually digest well… Galactoids (aka beans… but more on those in a few weeks).  Polyols are “sugar alcohols” and occur naturally in some foods, but are also used in processed foods as sweeteners.  For us, the high FODMAP polyols that we used as “challenges” to reintroduce to Little Man are apples, blackberries, pears, and mushrooms, as well as the moderate polyol FODMAPs of sweet potatoes and avocados.  Even though this was the least contentious of the categories to start with, it is one that I’ve been looking to forward the most because of its prevalence as a sweetener in juices, cookies, granola bars, fruit snacks, jams, and any other myriad of snack treat or food aimed towards kids.  Try finding jams, juices or fruit snacks for kids that don’t contain either high fructose corn syrup (another high FODMAP, but one that we try to eliminate anyway) or some form of apple.  Ugh…

Starting the reintroduction process has been nerve wracking.  Little Man’s tummy was looking good and it’s difficult to put that at risk, but I’m also excited to start this process so that we can (hopefully) finally know what his triggers are.  My hope is that it will be easier to only have to avoid a few triggers (please be only a few!) than the world at large.

For the reintroduction process, it’s important to not completely gorge on the food you are testing, but also to make sure that you eat a good portion. If you try too small of an amount, you may not get an accurate response.  So you should try a regular-sized portion (Shepard has suggestions), see if there is a reaction, and then try again.  If you have a regular sized proportion of a high FODMAP food and have a reaction, Shepard suggests that after your symptoms subside try the food again at a smaller amount.  It might just be that you can only tolerate a small bit.  Once you know what foods and what amounts of the foods you can (or cannot) handle, you can start to better understanding your triggers.  Shepard also suggests trying these trigger foods again at a later date.  Sometimes our systems change, and especially since Little Man is so young he may out grow (or may not) the unfortunate reactions he’s experiencing today.

It took us almost two weeks, but we just completed testing the Polyol FODMAP food group.  Luckily for us, Little Man did great with all of the polyols we tried.  He did so good, in fact, that for the first time in months I let him have one of the good fruit snack treats (sweetened with apple juice) we call fruit straws.  He was ecstatic, and so far I haven’t seen any bad reactions.  To celebrate this “challenge” Little Man and I ate our fruit snacks while going on an adventure walk in our neighbors’ Enchanted Forest.  Aside from the fruit straws, we were also treated to our first view of a native orchid species to these woods called Fairy Slippers.  The orchids are tiny, so it took us a bit of time to finally locate the amidst the larger Trilium and gorgeous yellow violets. Little Man, who is obsessed with all things Kung Fu Panda, was determined that we were having a hard time finding the Fairy Slipper orchids because a group of Croc bandits must have come through and taken them all.  Luckily we chased off the Croc bandits and found the orchids.  Whew!

Aside from apple, one of the polyol foods that I have been looking forward to “testing” are sweet potatoes.  We are still struggling with getting Little Man to eat vegetables (and fruit in any form that is not completely pulverized or turned into jam), but one that he will eat without any question is a sweet potato.  In our household we call these “french fries” even though they aren’t fried, aren’t made from regular potatoes (though you can use them if you want), nor are they in french fry shape (though you can easily cut them that way too).  Ah well.  The good news is that since Little Man has cleared this challenge, we can start enjoying sweet potatoes again at dinner time. Little Man’s favorite way to eat sweet potato “french fries” is in the form of Oven Roasted Sweet Potato Fries.  For the reintroduction celebration of sweet potatoes, I served them as Smokey Sweet Potato Bites.  I’ve included both recipes here, though the pictures are only for the Smokey Sweet Potato bites since the method is the same.  When we put these on the dinner table Little Man’s eyes lit up and he literally fell on them with both hands.  Dave and I were concerned that he was going to eat too many of them and therefore have a bad reaction, but all was well with the world and Little Man was super excited to have one of his favorite foods back.  Whew!

If you think that you don’t like sweet potatoes, maybe give them one more chance and try these out.  The cost and labor output is low, and you might be surprised by actually liking them.  I, myself, only like sweet potatoes in certain dishes.  I’m not a huge fan of baked sweet potatoes served like regular baked potatoes, nor do I like sweet potato fries especially if they are treated like a dessert and covered in cinnamon sugar.  Apologies to all of those sweet potato lovers who like those two dishes, but they simply aren’t my thing.  My classic Oven Roasted Sweet Potato “Fries” and Smokey Sweet Potato Bites, however, are totally different.  The sweetness of the sweet potato is balanced with the smokey spices, and the edges of each bite are crisped in the oven.  What’s not to like?  Here’s how they are made.

Oven Roasted Sweet Potato “Fries”
In our household, these are the classic form of “French fry” that appear on our dinner table regularly. They aren’t fried, nor are they made out of potatoes, nor are they in French fry shape (though you can easily cut them that way). What they are is delicious, and Little Man’s favorite vegetable. If you don’t think you like sweet potatoes, give these a shot. You might just change your mind.

Ingredients:
2 medium sweet potatoes
¼ cup olive oil, plus extra
Salt and pepper to taste

Directions:

  1. Preheat your oven to 400°. Prepare a baking sheet by drizzling a little olive oil over it, then spreading the oil around with your fingers to evenly cover the pan. Set it aside.
  2. Peel the sweet potatoes, and then cut them in half the long way. Then cut those halves in half the long way again. Line up your sweet potato quarters and slice them into ¼ inch “bites.” Try to keep the pieces close to the same thickness, otherwise the really skinny ones will burn before the thicker ones crisp. Once all of your sweet potatoes are chopped, place them in a large bowl.
  3. Add the rest of the ingredients to the bowl and toss with a large spoon until the sweet potato bites are evenly coated.
  4. Pour the seasoned sweet potatoes out onto the prepared baking sheet. Be sure that your sweet potatoes are all in one layer, spreading them out if needed.
  5. Bake for 30 minutes, checking the “fries” towards the end of the cooking time to ensure that they aren’t “over caramelizing.” If they are getting too dark at the corners of your baking sheet, simply flip them around with a spatula moving the darker pieces into the center and the less done pieces to the corners.
  6. Once the fries are crispy and browned, remove the pan from the oven and move the bites with a spatula into your serving bowl. Taste for seasoning, adjusting if necessary. Enjoy!

Click here for a printable version of my Oven Roasted Sweet Potato “Fries” recipe, and keep on reading for another variation (this time with pictures!).

Smokey Sweet Potato Bites

Smokey Sweet Potato Bites
These are a smoky, spiced version of the classic Oven Roasted Sweet Potato Fries that Little Man loves. That basic recipe can be a blank canvas to season with whatever spices and herbs you are feeling inspired by. I love the smokey paprika with these fries, and they pair fantastically with roasted chicken or pork, or with any hearty vegetarian main. Like with the classic version, if you don’t think you like sweet potatoes, give these a shot.

Ingredients:
2 medium sweet potatoes
¼ cup olive oil, plus extra
2 tsp. ground cumin
2 tsp. ground coriander
2 tsp. smoked paprika
Salt and pepper to taste

Directions:

  1. Preheat your oven to 400°. Prepare a baking sheet by drizzling a little olive oil over it, then spreading the oil around with your fingers to evenly cover the pan. Set it aside.
  2. Peel the sweet potatoes, and then cut them in half the long way. Then cut those halves in half the long way again. Line up your sweet potato quarters and slice them into ¼ inch “bites.” Try to keep the pieces close to the same thickness, otherwise the really skinny ones will burn before the thicker ones crisp. Once all of your sweet potatoes are chopped, place them in a large bowl.
    I included this picture to let you know the approximate size that I tend to buy of sweet potatoes.  I generally avoid the ones that are closer to small comet size.

    I included this picture to let you know the approximate size that I tend to buy of sweet potatoes. I generally avoid the ones that are closer to small comet size.

    The look after being peeled...

    The look after being peeled…

    Halving them lengthwise...

    Halving them lengthwise…

    Then halve them lengthwise again, and slice into little arcs.  These are perfect bite size (or for little fists...) bites.

    Then halve them lengthwise again, and slice into little arcs. These are perfect bite size (or for little fists…) bites.

  3. Add the rest of the ingredients to the bowl and toss with a large spoon until the sweet potato bites are evenly coated with the oil and spices.
    Adding the spices to the bowl.  I love smoked paprika.  Look at that color!

    Adding the spices to the bowl. I love smoked paprika. Look at that color!

    Evenly tossed raw sweet potato bites with spices and olive oil.

    Evenly tossed raw sweet potato bites with spices and olive oil.

  4. Pour the seasoned sweet potatoes out onto the prepared baking sheet. Be sure that your sweet potatoes are all in one layer, spreading them out if needed.
    Pouring the bites onto a prepared baking sheet.

    Pouring the bites onto a prepared baking sheet.

    Smooth out the pile so that each bite can get nice and crispy in the oven.

    Smooth out the pile so that each bite can get nice and crispy in the oven.

  5. Bake for 30 minutes, checking the sweet potato bites towards the end of the cooking time to ensure that they aren’t “over caramelizing.” If they are getting too dark at the corners of your baking sheet, simply flip them around with a spatula moving the more done pieces into the center and the less done pieces to the corners.
    These are about halfway done.  Flip them here so that both sides get golden brown, and if any on the edges are browning too quickly you can move them to the center.

    These are about halfway done. Flip them here so that both sides get golden brown, and if any on the edges are browning too quickly you can move them to the center.

    Here they are almost perfect.  You can taste them now to adjust for seasoning.

    Here they are almost perfect. You can taste them now to adjust for seasoning.

  6. Once the sweet potato bites are crispy and browned, remove the pan from the oven and move the bites with a spatula into your serving bowl. Taste for seasoning, adjusting if necessary. Enjoy!

    Smokey Sweet Potato Bites!

    Smokey Sweet Potato Bites!

Click here for a printable version of my Oven Roasted Sweet Potato “Fries” recipe or my Smokey Sweet Potato Bites recipe.

Cooking with Kids

When I first started cooking with Little Man, he couldn’t yet walk.  I would hold him on my hip and press his little hand around a long wooden spoon and let him “help” me stir whatever I was making.  As he grew older, I started asking him to help me cook or bake and he would gleefully dump in a cup of flour that I’d filled for him.  Sometimes he would drop the entire thing into the bowl, measuring cup and all.  Even if all he did was add in a premeasured scoop of flour, he would tell his Daddy proudly that he’d helped make the muffins.  Now more and more it’s not me asking him to come and cook with me, but if he sees me making anything in the kitchen he comes running up asking to help, dragging a stool in his wake.

Little Man helping me stir ingredients in a measuring cup in our tiny Iowa kitchen.

Two year old Little Man helping me stir ingredients in a measuring cup in our tiny Iowa kitchen.

I don’t want this to sound like a fairytale of always awesome cooking experiences.  In fact, there are numerous times when I ask Little Man if he’d like to help me cook or bake and his answer is a curly haired blur of “no” as he runs off to do something else.  But, since I’ve taken the time to slow down and get him involved with baking special treats or snacks, as well as making pancakes or stirring dinner, he now thinks of cooking or baking as something that can be fun to do and he often helps me in the kitchen.

Here three year old LM has his first ball of bread dough to play with.

Here three year old LM has his first ball of bread dough to play with.

Cooking with kids is a completely different ball game from the cooking you do on your own, and for some people it can be incredibly stressful.  When I first learned that I was pregnant with Little Man, I knew that I wanted to have special cooking times with him, and I also knew that I was going to have to change how I worked in the kitchen.  I was a good cook, but often got stressed out when trying to cook with someone in the kitchen with me.  If Dave was in our tiny kitchen as I cooked… forgetaboutit… not good.  Around the same time there were numerous T.V. series about people learning how to host television cooking shows, and much of what they were learning was about how to cook nicely with others and how to teach cooking.  I started watching these shows and trying out their advice so that I could learn to play nicely with others in the kitchen, and hopefully be able to teach my son both how to cook but more importantly how to love cooking.

The Blank Park Zoo in Des Moines, Iowa, also had mini

The Blank Park Zoo in Des Moines, Iowa, has  cooking workshops for kids. LM got to color his own chef’s hat and then make a turtle cup cake.

Learning how to cook with Little Man has taken quite a bit of trial and error, but now it’s something that we both look forward to.  For me, the three main goals for cooking with kids that I try to be mindful of are to:
1. Choose a time to cook when you aren’t pressed for time
2. Embrace the mess
3. Focus on the process not the product

LM is helping Dave grate cheese last Mother's Day for wraps to bring on our picnic.  I'm not sure how much cheese actually made it to the wraps, and how much was

LM is helping Dave grate cheese last Mother’s Day for wraps to bring on our picnic. I’m not sure how much cheese actually made it to the wraps, and how much was “sampled” by the chefs.

Timing is Everything!
There are days (and quite a few of them) when I simply need to get dinner on the table.  There’s not a lot of time to mess around, I just need to get into the kitchen, get dinner going and onto the table asap.  Those times are not the best for cooking with Little Man.  I do my best to never turn him away if he asks to help me cook, but it’s taken lots of practice for me to be able to do this, and frankly there are times when it wouldn’t be safe for him to help me (like even shallow frying or browning meat/veg with splattering oil).  This is why when I know that I will be making something that is calmer, that is a particular favorite of Little Man’s, or when I know that I can be more relaxed with when a dish or treat is done then I invite Little Man to come and cook with me.  I try to be strategic when I can.  There are even certain dishes that he loves that I require he cooks with me, like boxed mac and cheese.  If you want to see a great Pavlovian-dog response with Little Man, shake a box of mac and cheese in his vicinity.  You’ll see his eyes widen, back straighten, and curls bounce as he runs to see if he heard that rattle correctly.  So now, if we’re having boxed mac and cheese, then he’s the one making it (just not the draining of the hot pasta part yet), with my help of course.

It’s the issue of time and timing that I’ve had to work on the most for cooking with Little Man.  As with anything else dealing with kids, if you are stressed about it your child will be stressed too.  I had to practice this, but it’s almost like a deep breathing exercise.  Just accept the fact that if it normally takes you 20 minutes to get a pan of muffins into the oven, when you first start cooking with a child that time could easily double, but that’s OK.  The goal isn’t speed here, it’s teaching your child how to cook, how to enjoy cooking, and most importantly getting to spend some special time with you while doing so.  If it takes you a few more (or many more) minutes to cook something together, then those are bonus moments that you get to spend together doing something fun.

These were LM's birthday cup cakes to bring to day care.  I found little sprinkles all over the kitchen for days.

These were LM’s birthday cup cakes to bring to day care. I found little sprinkles all over the kitchen for days.

Embrace the Mess!
Much like giving up control of your timeline, especially when first learning how to cook with your child or when cooking with a young child you need to accept the fact that it’s going to get messy.  Just ask my husband (or mother-in-law… wait… on second thought don’t do that…), I am not the most organized or cleanest cook out there.  I’ve gotten better over the years, but I tend to leave a swath of destruction in my wake (just check out the background in the banner image of this post… wait, no don’t do that… its too messy).  I’ve been practicing being better, specifically as an example for Little Man as we cook, but I have a bit of work to be done there.

That said, I am trying to cook cleaner, so when I first started baking with Little Man it was hard for me to let him do the scooping of ingredients on his own.  I would scoop the flour/sugar/spice, hold the measuring cup or spoon over the bowl and only then let him dump the ingredient in.  The reason I did this was partly based on Little Man’s age at the time, and partly based on my own desire to control the potential chaos in my kitchen.  You know best the abilities of your child, and if you aren’t sure of his/her abilities in the kitchen then start with what you are comfortable with and move up from there.  Just remember that your child learns and develops at an astonishing rate.  You (meaning me too) need to remember to let your child push his/her abilities from time to time to see what they really can do.

Increasingly Little Man asks if he can do any of our cooking or baking tasks “all by” himself.  Since baking particularly needs to be pretty precise, I will still often scoop and level a measuring cup or spoon, but then I hand it over immediately to Little Man who will then move it to the bowl and dump it.  Especially at first there was quite a bit of spill over with a winter-esque coating of flour and/or sugar across the kitchen counter when we were baking.  But that didn’t matter.  He could dump an entire cup of flour on the floor… much like I myself did last night… and it wouldn’t matter.  We would look at each other then bust up laughing.  I’d help him do the correct measurement, and then we’d stop to clean up the mess together.  As with anything else in life worth learning, you are going to make a mistake from time to time.  It’s important that we give our kids the freedom to make mistakes and to learn from them as well.  This also gives Little Man practice in cleaning up, but he doesn’t mind doing it with me since it’s all a part of the cooking game.

I love how serious he is here with his mixing bowl, as he whisks dry ingredients together.  The flour cloud must have subsided by the time I took the picture.

I love how serious he is here with his mixing bowl, as he whisks dry ingredients together. The flour cloud must have subsided by the time I took the picture.

It’s About the Process Not the Product
This last goal for cooking with kids really sums up the previous two about letting go of stress about time and cleanliness.  If your muffins are the ugliest in the world, that’s just another part of the great story that you’ll tell for years.  And who knows, even though they look a mess those ugly muffins might still be delicious.  If you make something that is a complete flop, inedible to the core, again this can become part of family lore and it can also be a great opportunity to call in reinforcements like the local pizza delivery place.  The only thing that matters is that you were in the kitchen cooking with your child.  Period.  End of story.

If you are going to cook, at some point you are going to fail in spectacular proportions.  I, myself have had some doozies.  For years Dave would not let me make mashed potatoes since mine were insipid at best, watery and under/over seasoned at worst.  Then there was also the first Thanksgiving meal that I made him.  That shall not be spoken of here.  There was also the time that I didn’t just “over caramelize” the kale chips at my mother-in-law’s house, I incinerated them.  I’m not even sure there was any forensic evidence left of those “chips” that had started out as a beautiful head of expensive kale.  Perhaps a fancy chef could have used them as a kale ash garnish for something, but for me that fail was so spectacular the only thing I could do about it was laugh and deposit my creation in the organic bin.

We all make mistakes.  Frankly these mistakes in cooking mean that we are trying something new, and hopefully we can learn from what went wrong, making our cooking better for the next time we try that recipe.  Like my “blackened” kale chips, I learned to watch crisping kale like a hawk, never taking my eyes off of it.  From your cooking mistakes you can learn to make your own cooking better, as well as letting your child learn from mistakes too.  What is most important here is that you deal with the mistake with grace (and maybe even some laughter), try to troubleshoot it to see if it can be fixed (more learning moments here), and if all else fails you clean up together and try again (or call for take out).

LM loves chocolate and I love all of the healthy ingredients I get to sneak into his snacks.

LM loves chocolate and I love all of the healthy ingredients I get to sneak into his snacks.

Getting Started…
The best way to get started cooking with your child is to choose a recipe that is a sure fire hit with your child, as well as being one that fits your comfort level in the kitchen.  For me, that “dish” was boxed mac and cheese.  It’s not even a recipe, really just more of following instructions on the box.  What was important for me was that this is something that Little Man LOVES, that we could pull off quickly before his attention span faltered, and that turns out the same every time.  The first time “we” made mac and cheese together, all he did was dump in the sauce mix and stir the milk in for a few seconds before he decided he wanted to go play.  No problem.  He played and I finished off our masterpiece.  For lunch that day he was super impressed with himself that he had helped Mommy make the food.  As Little Man has grown more confident in the kitchen, I keep finding new things for him to do.  I think that the first actual recipe we did together was for Banana Chocolate Muffins (see above picture for the results).  From that point on I made a point of asking him to come and cook with me whenever I was following a recipe for a dish that I knew he would particularly like (such as pancakes), as well as letting him join in when ever he asks.

What I’ve started to do recently is to ask Little Man if there is something that he would like to make with me in the kitchen.  Right now that question still stumps him a bit since he doesn’t know the options he has to choose from.  So if he seems stalled, I suggest a couple possibilities that I know we have ingredients for and let him choose.  I think the next thing we’ll try is to flip through one of my cookbooks with pretty pictures and see if something catches his fancy.  Let’s just hope he doesn’t choose some form of fancy souffle.  But you know, even if he does choose a souffle, something that I’ve never made before, and even if it is a magnificent flop, we’ll have a blast doing it.  I might just be sure that I have the ingredients for some Not So Traditional Chocolate Chip Cookies stashed away… just in case.

Here are my favorite recipes to make with Little Man:
1. Mini Chocolate Cupcakes
2. Auntie Erin’s Cocoa
3. Cheddar Chive Scones
4. Marie’s Hummus
5. Mom’s Latkas
6. Perfect Spelt Pancakes (also Perfect Whole Wheat Pancakes)

Enough chatter, get out there and cook with your favorite kid or kiddos.  And if you have any tips that have worked for you, please let me know in the comment section.  I’m always interested in learning more.

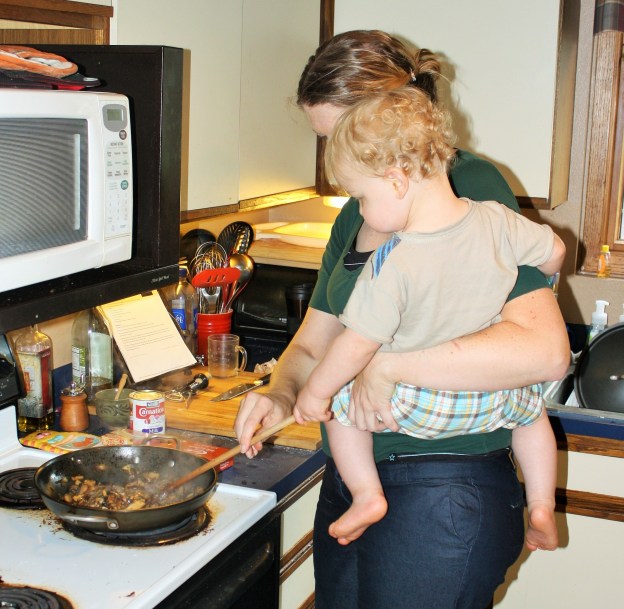
Based on my outfit, I must have just come home from teaching, jumped into the kitchen, then grabbed LM for some Mommy time while making dinner.
Based on my outfit, I must have just come home from teaching, jumped into the kitchen, then grabbed LM for some Mommy time while making dinner.

Friendship Cookies and Good Bye Tears

Sometimes there are things that I want to write about, but the moment is a bit too close at hand.  I started to write this post last August after a dear friend from Pella and her family visited us for a couple of days in the middle of their epic road trip from Iowa to British Columbia and then back down to the Oregon coast.

Dinner on the Deck

Dinner on the Deck

Visiting the fairy doors at Neck Point.

Visiting the fairy doors at Neck Point.

We’ve done a lot of moving around, Dave and I.  From various apartments in upstate New York during graduate school through our impromptu academic tour of the American Midwest and now to Vancouver Island.  Most of these “homes” have not lasted for more than two years before we move again following the job market.  In each of these places we have been blessed with some amazing friends.  The kind who we may not see for a year (or more), but the minute you are back in contact it’s as if you were never apart.  Conversations pick up as if we had just been chatting yesterday, and it is this effortlessness that makes it all the more gut wrenching when you have to leave them again.

Learning to skip stones at Neck Point.

Learning to skip stones at Neck Point.

Also checking out the gorgeous sea life in the shallow waters.  Can you see all the tiny crabs?

Also checking out the gorgeous sea life in the shallow waters. Can you see all the tiny crabs?

Sailing cork boats at Transfer Beach, Ladysmith.

Sailing cork boats at Transfer Beach, Ladysmith.

Which brings us back to the post that I started last August.  Little Man still talks about Iowa as a place that he wants to go back and visit.  In fact, he consistently talks about how “tomorrow” we need to catch a plane and go to Iowa then to China to visit his Kung Fu Panda friends.  At first I thought he assumed that all travel must go through Iowa since that is the last place that he traveled from on our move here.  So we pulled out the globe and his map and I showed him how Iowa is in no way closer to China than we are here.  Then Little Man explained to me that the goal was to visit Iowa and his blue home (our house there was painted blue with a scarlet front door), then to travel on to the Jade Palace in China.  Ah…

20140714_201411

20140715_175049

20140716_181620

When our friends came out to visit from Iowa, it was as if we’d just parted company the day before, not the year it was in real time.  We played, the kids played, and we ate, drank and talked for hours.  It was fantastic.  And as is often the case, the better the visit is, the sadder the departure.  We had already taught Little Man the Turkish tradition of throwing water on the vehicle of loved ones who are leaving to ensure that they must come back soon.  So as they were getting into their car, Little Man was urging me on quickly to grab a container of water to make sure they came back.  We dowsed the car, and are still waiting with baited breath for them to return.

20140714_174432

He was quiet as we went back inside after their departure.  We closed the front door and Little Man looked out the window watching their car disappear around the corner into the woods.  Dave scooped Little Man up and took him to the couch in his arms.
“Daddy, what does ‘sad’ mean?”
Little Man’s head was bowed so all I could see were his golden curls, not his face.
“Sad is something we feel when we are upset.  Are you sad that your friends are leaving?”
A nod of curls followed by, “Do you cry when you feel sad?”
“Yes, some times we cry when we feel sad,”  Daddy said.  “It’s OK to cry when we feel sad.  It’s OK to cry.”  Daddy folded him in his arms as Little Man’s face crumpled into tears.

Paparazzi taking photos of dinner.

Paparazzi taking photos of dinner.

We had to treat our Iowa friends to some locally caught salmon.  This time packet grilled and seasoned with ginger, garlic, chives and soy.

We had to treat our Iowa friends to some locally caught wild salmon. The salmon was packet grilled and seasoned with ginger, garlic, chives and soy.

Dave's famous... I mean, Joe's famous potatoes.

Dave’s famous… I mean, Joe’s famous potatoes (Cabin Grilled Potatoes)

This much sauteed kale with garlic, came from...

This much sauteed kale with garlic, came from…

this much rainbow chard that came from...

this much rainbow chard that came from…

my glorious garden.  I can't wait to see it lush like this again!

my glorious garden. I can’t wait to see it lush like this again!

I stood in the kitchen, “good bye” tears in my eyes, and tried to gain control.  My “plan” had been to hold it together for Little Man’s sake, so I could comfort myself with tears later after he was asleep.  No such luck.  So instead I baked.  The known movements of measuring, portioning and stirring were comforting, as was the aroma from the oven.  For this moment, for me at least, the main point wasn’t the special treat to eat afterwards, but the actions and senses leading up to it.

20140715_110745

That visit spurred me on to try to find Little Man more friends here on our island.  He was only 2 1/2 when we left Iowa, but all of his little friends that he’d known since birth were now far away and it’s hard (even for a little guy) to break into a community like Nanaimo where many people have lived for generations and don’t know what it’s like to be new in a place and friendless.  Now, to celebrate when we make new friends or for special play dates (generally outside ones where errant chocolate chips won’t ruin someone’s couch), I like to make a baked treat to bring along.  Sometimes this means mini-muffins or scones, but what we’ve started thinking of as special treats with friends are cookies.

IMG_4419

One of my favorite comfort foods is an old fashioned chocolate chip cookie.  However, the “old fashioned” part has had to be updated a bit for our current dietary requirements.  My goal here was to take that standard recipe for a delicious chocolate chip cookie with crispy edges and a chewy center loaded with chocolate chips, and make it into something that while it would be a stretch to call it “healthy” I could feel good about feeding my child and offering to other children (and parents, of course).  So in my case that meant getting rid of the wheat and using spelt flour, which still has some gluten for texture but has less of the gastro-issues than wheat has, and sneaking in some chia meal to up the “goodness” value.

As I’ve written before, there’s no need to go out and buy a special bag of chia meal.  If you have chia seeds at home, all you need to do is pour some of the seeds into a coffee grinder or food processor and blitz them up.  Creating your own chia meal has the added benefits of making all the great nutrients of chia more easily accessible to your body, and there is less chance of a stray whole chia seed getting into your dishwasher and growing like a chia pet.  If you don’t have chia, but do have flax seeds feel free to use them the same way.  If you have neither, then you can simply replace the amount of chia meal for a flour of your choice, or even oats.

Enough talking, let’s make some cookies…

Not So Traditional Chocolate Chip Cookies

Not So Traditional Chocolate Chip Cookies
Ingredients
:
2 cups spelt flour (or whole wheat)
¼ cup chia meal (see note)
1 tsp. baking soda
1 tsp. salt
1 cup (2 sticks) good quality dairy free margarine (or butter), softened
1 cup brown sugar
½ cup white sugar
1 tsp. vanilla extract
2 large eggs
2 cups semisweet chocolate chips

Directions:

  1. Preheat your oven to 375°. Set aside an ungreased baking sheet.
  2. Combine the spelt flour, chia meal, baking soda and salt in a small bowl. Set this aside.
    I was making these cookies more or less in the dark since Little Man was having a hard time nodding off that night.  So if the flash seems a bit harsh, that's because it was the only light source.

    I love how the chia meal always looks like I’ve just dumped a ton of black pepper into a recipe. Trust me, it will work its way in unobtrusively soon.

    See, the chia meal is whisked into the rest of the dry ingredients and away it goes.

    See, the chia meal is whisked into the rest of the dry ingredients and away it goes.

  3. Combine the softened margarine (or butter), sugars and vanilla in a large bowl either by hand or with an electric beater or stand mixer. Make sure the mixture is smooth and creamy.

    There's no need to use any other tool than a large spoon and a little elbow grease to combine the wet ingredients here.

    There’s no need to use any other tool than a large spoon and a little elbow grease to combine the wet ingredients here.

  4. Add the eggs, one at a time, to the butter mixture, combining well.

    Adding the eggs, one at a time.

    Adding the eggs, one at a time.

  5. Carefully add the flour mixture to the butter mixture, stirring slowly at first so that you don’t create a flour cloud by beating your ingredients too enthusiastically. Make sure that the dough is smooth and thoroughly combined.

    I did the sizing of the bowls backwards in this picture, so this step might look a little different for you.  It will still taste amazing in the end.

    I did the sizing of the bowls backwards in this picture, so this step might look a little different for you. It will still taste amazing in the end.

  6. Add the chocolate chips, stirring just to distribute them throughout.

    I'm surprised that Little Man didn't sense the chocolate being added to the bowl and run out in his pjs requesting a sample.

    I’m surprised that Little Man didn’t sense the chocolate being added to the bowl and run out in his pjs requesting a sample.

  7. Using two spoons (or a small scoop if you are feeling fancy) scoop out and drop tablespoon-sized portions of dough onto the baking sheet, spacing them a few inches apart since the dough will spread while baking.

    The dough is a little glossy here since the cookies had been in the oven for a minute or so before I remembered to take the photo.

    The dough is a little glossy here since the cookies had been in the oven for a minute or so before I remembered to take the photo.

  8. Bake the cookies for 9-11 minutes or until nice and golden brown. The cookies should not look wet in the middle, but will be soft when you take them off of the tray.  Don’t worry, they will firm up as they cool. Remove the tray from the oven and let the cookies sit for about 5 minutes before moving them to a cooling rack. They can be cooled completely or served immediately. Just warn little mouths about the potential for hot, melted chocolate chips.
    Perfectly golden.

    Perfectly golden.

    Dangerously ready to eat.

    Dangerously ready to eat.

  9. You can continue baking the cookies until the dough is done, or take any dough that you don’t wish to bake now, form it into a log on plastic wrap, cover it securely and keep it in the freezer until you are ready to slice and bake the cookies. You may need to increase the baking time by a few minutes, so watch them carefully towards the end. The dough can be frozen for up to a few weeks.  Enjoy!
    You can freeze cookie dough to make your own slice and bake cookies, ready whenever you want them to be.

    You can freeze cookie dough to make your own slice and bake cookies, ready whenever you want them to be.

    No, the cookie log does not need to be perfect.  You are just going to slice and bake it so don't waste too much time making the perfect cylinder, unless you have a food stylist snooping around in your freezer.

    No, the cookie log does not need to be perfect. You are just going to slice and bake it so don’t waste too much time making the perfect cylinder, unless you have a food stylist snooping around in your freezer.

Note: Make your own chia meal by blitzing up chia seeds in a coffee grinder or food processor. You can also do the same with flax seeds, or make oat flour by blitzing up whole oats (not instant, please). Store any extra chia meal in the freezer to keep it fresh.

Click here for a printable version of the Not So Traditional Chocolate Chip Cookies recipe.

All these need is a glass of milk.

All these need is a glass of milk.

20140715_110758

And a friend.

Walking at Neck Point.

Walking at Neck Point.

A Moment of Glamour

“Mommy, why do you have fuzzy blue cow ears on your eyes?”

Let me back up and set the stage for my astounding moment of glamour, which unfortunately spanned the week that I was at Dave’s family cabin last August.

Perhaps you have found yourself in a similar situation.  You run into the store, grabbing things off of your list with reckless abandon.  In my particular case, we were leaving for a week of vacation at Dave’s family’s cabin in the British Columbia interior that would include a family reunion with Ruth’s lady cousins from Campbell River.  There were just a few things I needed: sunscreen, toothpaste and mascara.  Everything else was packed and in the car, as were Dave and Little Man.  The ferry was waiting.  I kept mumbling to myself our archaeology field saying “don’t panic, be quick.”

The view of the lake from the cabin's deck.

The view of the lake from the cabin’s deck.

It was only after I’d gotten back into the car, we’d driven to the ferry terminal and gotten in line to drive on board that I flipped open the car’s vanity mirror and pulled out my purchases.  I wanted to finish putting on my mascara since the tube I had at home was mummy dry.  I opened the mascara package, unskrewed the lid, pulled out the brush… and stared dumbstruck at the mascara wand.  It was dry.  More than dry, it was empty.  So I put the wand back in, swirled it around and pulled it out again just to have the same view.  But now my travel rushed brain was picking up on my visual cues.  The mascara wand was not dry, but was in fact heavily coated with blue mascara.  And not just any blue, but indigo blue.  Bright, 1980s, nearly fluorescent, indigo blue.  Doh!  But at this point I had no other options.  They don’t sell mascara on the ferry.  I’d just have to wear this gloriously indigo blue mascara for the day, and we’d stop at a store in Kamloops or somewhere to buy some normal black mascara on the way.  That was a good plan, and as with all good plans…

Little Man and Papa taking a tour of the lake.

Little Man and Papa taking a tour of the lake.

So I showed Dave what I’d done, applied the mascara, and gamely kept on going as if I didn’t look completely ridiculous.  Once we were parked on the ferry, had ferried Little Man and his accoutrement to the passenger deck, and found seats, I turned to Dave and asked him to truthfully tell me how ridiculous I looked.  It’s just mascara, right?  How bad could it be?  Dave blinked and stated that it didn’t look too bad.  No one would notice.  Just then Little Man tugged on my arm and asked for one of his traveling toys.  I turned to him and handed him what he had asked for.  My darling three year old boy glanced at me, did a complete double take, stared with squinting attention at the upper part of my face and asked, “Mommy, why do you have fuzzy blue cow ears on your eyes?”  I said nothing, just turned to look at Dave, who at this point had burst into hysterical laughter and was close to falling out of his chair.  I still owe him for that.

Papa showing Little Man the finer points of battling with water noodles.  I'm not sure who instigated things...

Papa showing Little Man the finer points of battling with water noodles. I’m not sure who instigated things…

As it ended up, somewhere in the joys of the six hour car trip with a three year old, we both completely forgot to stop at a store for mascara.  The family cabin is indeed in the interior, and it is a 45 minute trip one way just to get down to the local store.  I couldn’t justify making the drive solely for my vanity, and decided to wear my “fuzzy blue cow ear” eyes with pride.  My lovely sister-in-law took my “new look” in stride, thinking that I was just trying something different.  This makes me wonder what she thinks of my normal look…  Lest the lady cousins thought that I was truly trying to pull off a fluorescent blue mascara “look,” I shared the story of my moment of glamour… that would end up spanning the week… with them.  They took it in stride and filled my glass.  The mascara was a stunner.

This is me borrowing Little Man's lion floaty at the lake.  It makes one feel more secure when swimming to have a lion at one's side.

This is me borrowing Little Man’s lion floaty at the lake. It makes one feel more secure when swimming to have a lion at one’s side.

Once back home the tube of indigo blue mascara would live for a few months at the back of my bathroom drawer, with the thought that maybe for Halloween…  Then once that holiday passed, it went into the land of no return, aka the trash bin.  And while that particular fashion moment will hopefully not be repeated by me, it does still live in infamy as recorded in every picture of me from that week, especially in those that focus on my face like those when I am holding my then months old niece.  Ah, the glamour…

Even my baby niece is amused by the blue mascara.

Even my baby niece is amused by the blue mascara.

Always a stunner, the view of the lake changes from one moment to the next.

Always a stunner, the view of the lake changes from one moment to the next.

The Reckless Abandon of Sunshine on Easter

Growing up in Southern California, our Easter egg hunts were always outside in the gloriously warm sunshine.  In fact, there was often a bit of hurriedness to our egg collecting fueled by concern over finding all of the chocolate eggs before they melted in the sun.  Here on Vancouver Island we’ve learned that early Spring time might be cool and sunny, or it might be dreary and wet, or it could be any number of different temperatures and dampness factors changing every quarter hour or so.  It’s best to be prepared for anything, and simply to enjoy whatever weather comes your way.

While Easter dawned sunny, it was still quite frosty in the shade and a good jacket was required.

While Easter dawned sunny, it was still quite frosty in the shade and a good jacket was required.

We all enjoyed bunny bum pancakes.  The tail is made from a dollop of butter topped with shredded coconut.

We all enjoyed bunny bum pancakes. The tail is made from a dollop of butter topped with shredded coconut.

Little Man decided that his bunny heeded eyes and a nose as well.  I think he was just lobbying for more chocolate chips, but it worked.

Little Man decided that his bunny needed eyes and a nose as well. I think he was just lobbying for more chocolate chips.

We were mentally prepared for just about any kind of weather for this Easter, while having all fingers and toes crossed for sunshine since we were having five families over for a lunchtime potluck and egg hunt.  We knew that we could all crush into the house and have the egg hunt downstairs if need be, but it would be so much nicer outside! In the end, we were blessed with one of the most beautiful Easter afternoons that we’ve had in years.  While it wasn’t So Cal warm, we could be outside without jackets, sunglasses were needed to not be squinting into the dazzling light, and the grass was dry enough for the kiddos to roll around with reckless abandon.  It was fantastic, and we hadn’t even gotten to the food yet.

The kiddos are diving into their Easter potluck feast.  Ears and sunglasses abound.

The kiddos are diving into their Easter potluck feast. Bunny ears and sunglasses abound.

After the kiddos got to run around a bit, we gathered them together on the back deck to get them started eating and then the adults joined in.  Our table was overflowing with food.  We provided pulled pork sandwiches, a green tea punch, and a chocolate cake for dessert.  Our friends also contributed a seven layer dip with chips (they did it as a five plus two layer dip, thoughtfully leaving the two dairy items on the side for those with dairy intolerances), a sun dried tomato pasta salad, Easter Bunny white chocolate bark, stuffed potato skins with cheese and bacon (some graciously set aside for vegan cheese), black bean dip with veges, a Thai peanut broccoli salad, and other Easter treats.  To say the least, no one left hungry and even the adults looked like we could all use an Easter nap.

Our amazing Easter spread!  Pulled Pork sandwiches, coleslaw, dips, chips, salads, Easter treats, it was a wonderful lunch.  See below for recipes for the things that we brought to the table.

Our amazing Easter spread! Pulled Pork sandwiches, coleslaw, dips, chips, salads, Easter treats, it was a wonderful lunch. See below for recipes for the things that we brought to the table.

Please ignore the messy kitchen, and focus instead on the handsome pastry chef and the amazing cake he is decorating.

Please ignore the messy kitchen, and focus instead on the handsome pastry chef and the amazing cake he is decorating.

Yes, indeed...  A chocolate cake layered with homemade chocolate rice crispies and topped with a chocolate coconut frosting that tastes better than chocolate mousse.  Life is tough.

Yes, indeed… A chocolate cake layered with homemade chocolate rice crispies and topped with a chocolate coconut frosting that tastes better than chocolate mousse. Life is tough.

Before we could get to napping, however, we had the Easter egg hunt.  After the adults finished eating, we sequestered the kiddos in our living room with the curtains drawn while half of the adults went outside to the front yard to hide the loot.  Each family brought filled eggs to share, so the front yard glittering with plastic eggs.  Then we released the hounds… I mean the kids… to fill their baskets.  Since some of the kiddos were older and faster than the others, we had a parent-led redistribution after the egg hunt to be sure that everyone had a good collection of booty.

Release the hounds... I mean the kids!

IMG_3736

Then the kiddos and adults got to play in the sunshine or wander over to meet the pigs, sheep and chickens at our landlords’ farm.  The trees were blossoming, the kids were laughing, the sheep were bleating, and it was one of the best Easter moments I’ve had in a long time.

If you want to share in some of the food we had for Easter, here are recipes for those items that we brought to the party.  The recipes for this post are a bit different since I was “in the party prep zone” when cooking and completely forgot to take any pictures while I was making the food.  Doh!  If there are any steps in the recipes that are hard to follow since there aren’t any pictures, or you simply aren’t sure about something, please send me a comment at the end of this post and I’ll get back to you asap.  Have fun!

Slow Cooker Pulled Pork

Fluffy Whole Wheat Rolls

Gluten Free Rolls – this recipe is not my own.  I followed the directions for soft rolls made with a Challah dough from the Gluten-Free Artisan Bread in Five Minutes a Day book by Jeff Hertzberg and Zoe Francois.  If you are getting into gluten-free baking, I highly recommend this book.  It makes the best tasting gluten-free bread that I’ve found to date.  Their bread has great texture and mouth feel without being grainy, and without using an obscene amount of corn starch.  Love it!  Click here for a link to recipes for rolls from their book.

Carolina Style Coleslaw

Chocolate Celebration Cake – This recipe is also not my own, but came from Jamie Oliver’s excellent Comfort Food cookbook.  The main differences for what I did was that I used spelt flour instead of all purpose, and I used an organic, puffed brown rice for the home made chocolate crispies.  I also used the same Chocolate Coconut frosting that I wrote about with Little Man’s birthday cupcakes from school.  Next time I think I’ll triple the frosting batch so that I can have some between the layers as well.

Any of these items (or all of them) would make for a fantastic outdoor picnic.  In fact, we will likely do a smoked version of a pulled pork sandwich for an outdoor party later this August.  I’m also toying with making cupcake versions of the chocolate celebration cake…  Stay tuned.  I hope you all are enjoying sunshine!  Our sunshine just went away for a couple of days, but I’m already plotting more outdoor fun as soon as the sun is back.  Or we’ll likely go outside to play in the wet anyway.  We’ve been cooped up inside for too long as it is.

IMG_3729

cake 4

Pancake Breakfast

I love Saturday breakfasts, and I guard this morning jealously.  Little Man is getting of an age when dance or sport classes might make an inroad to our Saturday breakfasts, but not quite yet.  It’s the one morning of the week when we don’t have to rush to be anywhere else.  No one has changed out of their sleep clothes before breakfast.  We haven’t washed our faces or brushed our hair, we just relax and enjoy being with each other.

Two of Little Man’s most requested breakfast foods are pancakes and waffles, which I don’t mind since I can still try to chock them full of as much nutrients as I can, then sit back and enjoy my own buttery, mapley goodness.  I love pancakes too.

IMG_3618

My favorite pancake recipe is adapted from one that we learned in upstate New York, from a family cookbook of dear friends that’s kept up at their camp.  When made with all purpose flour, these are the fluffiest pancakes I’ve ever had.  The only problem with them was that I always ate too much, and that left me feeling all sorts of blah.  So sometime after we moved away from New York I started experimenting with shifting the recipe around and incorporating whole wheat flour.  They were still fluffy and awesome, but I could feel good about incorporating some whole grains into them and they didn’t leave me collapsed on the couch.  I tweaked the recipe a bit more, thinning it out a bit when I wanted to make fun pancakes for little man, like his initials or a reindeer face, but for the most part I was very pleased with my Perfect Whole Wheat Pancakes.

Then came the shift in our diets and wheat was no longer welcome in our household.  It has been a tough break up.  Though I find that some of the gluten free flour blends are fine in some baked goods, I wasn’t happy with them in pancakes.  Then I tried replacing the whole wheat flour with spelt flour, and the results were fantastic.
IMG_3627The spelt flour pancakes are not quite as fluffy as the whole wheat version, but they are incredibly tender and have great flavor.  They aren’t just vehicles for butter and syrup, but have a great nutty taste of their own.  I do still need to thin the batter a bit to make the decorative pancakes, but a little loss of fluff is worth the gain in Little Man smiles when I made planet pancakes for his birthday.

For this post I’ve included recipe links for both my Perfect Whole Wheat Pancakes and my Perfect Spelt Pancakes.  The only difference between the two is in the flour used, but for the ease of people searching for recipes I’ve included them both.  The pictures here are from making a batch of the spelt flour pancakes.  If you are gluten intolerant, this recipe does work well with gluten free flour blends.  I’ve also dosed both versions of the pancakes with a good amount of chia seed meal with the goal of sneaking in whatever extra nutrients I can to Little Man’s diet.  You can, of course, purchase chia seed meal in the store, but it’s just as easy to buy a bag of chia seed and pulverize a bit every now and then in a coffee grinder.  That way you have the whole seeds around if you want them, and you can grind up the meal whenever you want.  I tend to make about 1/2 cup of chia seed meal at a time, and keep the rest in a baggy in the freezer.

Another plus is that if you have extra pancakes (or want to make an extra batch) these store really well in the freezer.  Little Man often eats pancakes or waffles for breakfast during the week when there is no way that we have time to make them from scratch.  So I tend to make larger batches on the weekend and freeze the leftovers.  A couple of seconds in the microwave or in a warm skillet and they are ready to go.

Oh, and one last thing before we get down to the recipe.  As one batch of pancakes are done, I put them in the warm oven on a baking tray and then start another batch.  The main joy of Saturday breakfast is that we all get to sit down together to eat, not to have one family member constantly cooking pancakes to only see them devoured before the short order cook ever gets a chance to sit down.  So use your warm oven well.  Get the food cooked that can hang out for a bit, like the pancakes and bacon, make the coffee or tea, doing the eggs last.  Then make sure that you get to sit down with your family and loved ones for a well deserved meal.  You want memories with your family, not ones where they only remember you standing by the stove.

Little Man and I adding frozen blackberries to a batch of pancakes in our "Saturday best."

Little Man and I adding frozen blackberries to a batch of pancakes in our “Saturday best.”

Perfect Spelt Pancakes
Ingredients
:
2 cups spelt flour
2 tbsp. chia meal (aka ground chia seeds)
1 ½ tbsp. baking powder
¾ tsp. salt
2 cups almond milk (or any kind)
2 eggs
3 tbsp. oil
1 cup blueberries, fresh or frozen (optional)

Directions:

  1. Heat a cast iron griddle or other large, flat skillet over medium heat. If necessary, brush your griddle with a little canola oil. Turn your oven on to low (200°) and place a baking sheet inside.

    You don't have to use a griddle to make pancakes, but the nice large flat surface makes it easier to form and flip the pancakes.  A pan with higher edges can make things a bit... awkward.

    You don’t have to use a griddle to make pancakes, but the nice large flat surface makes it easier to form and flip the pancakes. A pan with higher edges can make things a bit… awkward.

  2. In a large bowl whisk the dry ingredients together. Make a well in the center and set the bowl aside.
    The chia meal looks like a nice heap of black pepper right now, but it will completely disappear into the batter soon.

    The chia meal looks like a nice heap of black pepper right now, but it will completely disappear into the batter soon.

    The mixed dry ingredients with the chia incognito.

    The mixed dry ingredients with the chia incognito.

  3. In a large measuring cup or medium bowl, measure out the almond (or cow or coconut or soy, etc.) milk then break in the eggs and add the oil. Stir with a fork until the yolks are broken and the ingredients are more or less combined. This doesn’t need to be perfect.

    I like to in my milk into a large measuring cup, then add the eggs and oil.  They all get mixed together in this cup without dirtying another bowl in the process.

    I like to in my milk into a large measuring cup, then add the eggs and oil. They all get mixed together in this cup without dirtying another bowl in the process.

  4. Add the wet ingredients to the dry and stir to blend well.

    The batter is ready to go.  If I am making fancy or decorative pancakes, then I like to remove a bit to a small bowl and thin it out with some extra milk.  Then I put it into the pancake pen, or just free hand initials or planets or bunny bums, etc.

    The batter is ready to go. If I am making fancy or decorative pancakes, then I like to remove a bit to a small bowl and thin it out with some extra milk. Then I put it into the pancake pen, or just free hand initials or planets or bunny bums, etc.

  5. Make sure your griddle (or pan) is heated and oiled. Pour the batter onto the griddle in the amounts you desire. I use about ½ cup for a really big pancake with a tablespoon or slightly more for silver dollar sized ones.

    When I called these "perfect" pancakes, I was talking about taste not presentation.  I'm not interested in making Yoda faces or artistic pieces too pretty to eat.  These are pancakes.  They should be fun.  Don't sweat it if your child's initial is barely legible.  As long as they know what you're trying to do, you've succeeded.

    When I called these “perfect” pancakes, I was talking about taste not presentation. I’m not interested in making Yoda faces or artistic pieces too pretty to eat. These are pancakes. They should be fun. Don’t sweat it if your child’s initial is barely legible. As long as they know what you’re trying to do, you’ve succeeded.

  6. Wait until the edges of the pancakes start to look a bit dry and the bubbles stop forming. This is a relative waiting game, and will differ based on the heat of your griddle/pan, etc. Flip your pancakes and adjust the heat. If they are too brown turn down your heat and wait a moment to let the griddle/pan cool. If they are too pale, raise the heat slightly.
    The first batch of pancakes is always the sketchiest.  The griddle may be too hot or too cold.  Just adjust your settings or batter and keep on going.  You can always serve the "special" pancakes last.

    Look for the edges of the pancakes to start to be a bit dry and for the bubbles to slow in forming on the tops. This means that the pancake is set enough to flip without splattering all over the pan.

    IMG_3622

    The first batch of pancakes is always the sketchiest. The griddle may be too hot or too cold. Just adjust your settings or batter and keep on going. You can always serve the “special” pancakes last.

  7. Once cooked, remove the pancakes from the griddle and put on the warmed baking tray in the oven. Repeat with all of the remaining batter until all the pancakes are cooked. Prep/cook any sides you want, and warm the maple syrup (the real stuff, please). Enjoy an awesome breakfast!
    Pancakes staying nice and warm in the oven until the rest of breakfast is ready to be served.

    Pancakes staying nice and warm in the oven until the rest of breakfast is ready to be served.

    Any leftover pancakes can be reheated during the week for a fast and awesome breakfast.  I often make extra just so Little Man has some good pancakes to eat on a rushed week day morning.

    Any leftover pancakes can be frozen and then reheated during the week for a fast and awesome breakfast. I often make extra just so Little Man has some good pancakes to eat on a rushed week day morning.

Click here for a printable version of the Perfect Spelt Pancakes recipe.

Click here for a printable version of the Perfect Whole Wheat Pancakes recipe.

Making a Knotted Fleece Blanket

For a long time I resisted the urge to be crafty.  I liked the art things I did, like throwing pottery and making mosaics, but I didn’t “do crafts.”  I’m not sure what my issue was with being crafty, maybe I was too mired in graduate school to be allow myself the freedom to do fun creative things.  They had to be serious art, not fun.  Bleh!  Whatever the reason, soon after moving to Iowa and after Little Man’s birth I was invited to join a Mom’s Club and I started to notice that a number of the moms in our group were not only crafty, but made some truly beautiful things.  One was crafting a fantastic quiet book for her daughter with hand sewn pages of button flowers, and tie up shoes, etc.  Another was getting into felting and made phenomenal dolls and toys.  Most importantly, as beautiful as these pieces were, what made them the most special and unique was that the crafts were made for a specific person (or child) by someone who loved them.  I started to rethink my bias against craftiness.

I already knew that I loved throwing pottery and making mosaics, but neither one was really useful for Little Man the infant.  While I did throw some special bowls and plates for him, the fact that I made these specifically for him will be lost on Little Man for awhile yet.  I wanted to make something for him that he could have and use now.  I wanted it to be crafty, but functional at the same time.  I decided that I wanted to make him a knotted fleece blanket.

Of course I had no idea about how to go about doing such a thing, other than the fact that I’d need some fleece and scissors, but a little Pintrest research solved that issue.  I wrote down the things I would need, went to my local warehouse store, bought my supplies, and then proceeded to do nothing for weeks.  I watched the calendar move forward towards Christmas and dust gather on my plastic bags of goodies, but couldn’t bring myself to actually do anything with them.  One evening while I sat there and contemplated my bags of unfulfilled craftiness, I finally put words to my dragging feet.  I didn’t want to do the craft alone, but with friends.  Not because I needed any help, this craft is superbly simple, but I just wanted to share in the camaraderie of being crafty.  So I invited the members of the Mom’s Club over to my house with the caveat that each woman bring a craft that she wanted to work on.  I would provide snacks and a cocktail, and we’d see how much we got done.

In the end, I don’t think I accomplished much beyond laying out my fleece and getting it pinned together.  Not a single cut was made or knot tied that evening, but I had a wonderful time.  And after that, the knotted fleece blanket became something that I worked on in the evenings when Little Man was sleeping but we hadn’t yet gone to bed.  It didn’t take long to finish once I’d actually started it, and for Christmas Little Man got a soft, snuggly, fleece blanket that is still on his bed today. Looking back, that first Crafty Night was one of the moments that made Iowa feel like home, though it was far from family and anything but familiar.  In fact, it was the friends that I made through the Crafty Nights who I knew I would miss the most when we moved.

Little Man and his first knotted fleece blanket in Pooh Bear print with a cloud background.

Little Man and his first knotted fleece blanket in Pooh Bear print with a cloud background.

Then last Fall we needed a blanket to send with Little Man for his day care while I was teaching at the University of Victoria.  This was a big step for us all, since before in Iowa his day care had been in a lovely woman’s home with his best buddy and just a couple other children.  Here in Nanaimo day care would be much larger, and I really wanted to send him with something that felt like a big hug.  So off to the local fabric store I went, Little Man in tow to pick out his fleece.  Then the week before he was to start day care I pulled out the materials and went online to refresh my memory of how to put the whole thing together, only to find that the original post was gone.  Luckily it didn’t take me long to remember the few tricks involved, and I quickly had it all laid out, cut and knotted well in advance of the blanket being needed.

The night before Little Man was to start day care we read the Kissing Hand story about a racoon who is getting ready to go to school for the first time.  In the story the little racoon’s mom kisses his hand and tells him that the love of that kiss will stay with him all day long at school, and any time he needs to feel the warmth of that kiss he just has to lay his hand to his cheek.  Then we pulled out his new knotted fleece blanket and talked about how Mommy and Daddy’s hugs stayed with the blanket and that whenever he got to use the blanket at day care our hugs and love were with him.  Sappy, yes, but such is the life of parents of wee little ones.  Embrace it and move on.  😉

If you would like to make your own knotted fleece blanket, here are the instructions:
20140915_071904

Knotted Fleece Blanket Craft
This was my introduction into the world of being crafty. It’s a great place to start for someone who would like to make something for a loved one, but may not yet be ready to tackle something that involves machinery or needles. The soft fleece is machine washable and snuggly as a hug.

Supplies and Equipment:
2 pieces (1 – 1 ½ yards) of fleece. One patterned and one solid.
Scissors
Yard (or meter) stick
Lots of large safety pins

Directions:

  1. Machine wash and dry both pieces of fleece.
  2. Lay one piece of fleece face (or presentation side) down on a large, flat surface, such as a kitchen table. If the fabric has any sort of pattern or picture, the “pretty” side should be down and the dull side facing up.

    The first piece of fleece should be laid face down on the table, so the presentation side will be facing out when the blanket is done.

    The first piece of fleece should be laid face down on the table, so the presentation side will be facing out when the blanket is done.

  3. Lay the second piece of fleece face up on top of the first piece. Make sure that all edges line up. If one is larger than the other, trim the larger piece to fit the smaller. You may find that the person who cut your fleece at the store did not use a very steady hand with the scissors. This is your chance to clean up those edges, but don’t drive yourself crazy about it. Once cut and knotted most such inaccuracies will be invisible.

    The second piece of fleece should be laid face up so that the "pretty" side is visible.  I like using one patterned piece of fleece and one solid color.

    The second piece of fleece should be laid face up so that the “pretty” side is visible. I like using one patterned piece of fleece and one solid color.

  4. Using the safety pins, pin the two pieces of fabric together about 4 ½-5 inches in from the border. This will keep the two pieces of fabric together as you move it around to cut and knot the fringe.

    This craft uses a lot of large safety pins.  The more the merrier.

    This craft uses a lot of large safety pins. The more the merrier.

  5. Cut an approximate 4 inch square out of each of the four corners of your blanket. This is an important step so that your pieces fit together nicely.

    Could my cuts have been smoother?  Yes.  Do I care?  No.  Once knotted the messy edges disappear.  Remember that the goal is to have fun and to create something meaningful.  So relax, and give yourself the freedom to have some craft fun without the pressure of trying to be perfect.

    Could my cuts have been smoother? Yes. Do I care? No. Once knotted the messy edges disappear. Remember that the goal is to have fun and to create something meaningful. So relax, and give yourself the freedom to have some craft fun without the pressure of trying to be perfect.

  6. Lay your yard (or meter) measuring stick down along one straight side of the fleece about 4 ½ inches deep from the border. Use this as your guide as you cut the fringe incisions along the four sides of your fleece. Make 4 inch deep incisions through both layers of fleece at 1 inch intervals down the length of your fleece to create the fringe. Don’t panic if your incisions are not exactly at 1 inch intervals, just do your best. If you go too much thicker than that, then the knots can be a bit messy. If you do much thinner than that, and the knots look too small. Repeat this for all four sides of the blanket.

    Use a yard stick to space your fringe incisions along the four edges of your blanket.

    Use a yard stick to space your fringe incisions along the four edges of your blanket.

  7. Starting at one corner edge, loop both pieces of one section of fringe around your finger and tie a single knot as high up on the incision as possible. You should see the color of your bottom fabric at the base of the knot. Tie the knot tightly so that it does not unravel later. Some people pull the two layers of fleece apart and tie them in a knot that way, but I think the looping method of both pieces together looks nicer. Continue this until all fringe pieces are knotted.
    Loop both pieces of one fringe section around your finger.

    Loop both pieces of one fringe section around your finger.

    Knot the section as high up on the incision as possible.

    Knot the section as high up on the incision as possible.

    Pull the knot tight so that it doesn't loosen or come apart later, even in the wash.

    Pull the knot tight so that it doesn’t loosen or come apart later, even in the wash.

    Keep going around the blanket until all fringe sections are knotted.  This is a great activity for the evenings when you just want to relax a bit and not think too hard about anything.

    Keep going around the blanket until all fringe sections are knotted. This is a great activity for the evenings when you just want to relax a bit and not think too hard about anything.

  8. Remove all safety pins from the blanket, and let the snuggles begin!

    The finished blanket.

    The finished blanket.

Click here for a printable version of the Knotted Fleece Blanket craft.

An Eagle and the First Blossoms of Not-Yet-Spring

We were greeted by an eagle and the first blossoms of Not-Yet-Spring when Little Man and I went for a walk/bike ride the other day.  The sky was overcast and everything was deeply wet, but the paths were passable with only the occasional puddle of awesomeness to splash through.

Little Man tooled around on his balance bike, and has gotten quick enough that I now need to wear appropriate shoes so that I can jog along behind him.  He skidded through a couple of muddy areas, fish tailing and whooping, and kept on going while I slogged through in his wake.

20150211_100208 (2)

We heard the uproar of birds before we saw the eagle loop over the treetops above us.  Little Man called out that there was a “bald eagle,” and I think I saw enough of a white head and tail feathers to agree with him.  Later we would hear sea lions, but not be able to track them down as the wind shifted and carried their barking to different parts of the path.
20150211_100203 (2)Lastly we tracked down various fairy houses along the trails.  A posted sign described the different ecosystems of the park, and Little Man had a good time noticing the ocean ecosystem, the forest ecosystem, and the fairy ecosystem.  The number and placement of the fairy houses has changed since my first post about them (A Week On Our Own: Day 2), and its fun to keep exploring to see if we can find more and some have moved.  At the “Give a Little/Take a Little” fairy house, Little Man exchanged some leprechaun gold for a sparkly pink jelly bracelet that he promptly declared to be a “beautiful Power Ranger bracelet,” and had a wonderful time all day “transforming” it into a ring by coiling it up tightly.

I didn’t have our camera with us, so I made due with the camera on my phone.  While officially still Winter, it’s been a mild one for us here on the island.  This was the first tree that I’d seen actually blossoming, and in our yard there are mystery bulbs sprouting everywhere.  Our farmer-landlords’ garlic is looking good too, as are our Dinosaur Kale plants that have kept doggedly at it since the summer.  Though our winter has been mild, February isn’t over yet, and I try not to think about Spring too much in case something changes.  It was in February and then again in March of last year that we woke up to a huge snow dump after all (I Woke Up To the Snow and Embracing the Snow).

20150211_100228

20150211_100233 (3)

As we walked along, skidded out, and laughed our way through our beautiful but overcast surroundings, I couldn’t help but wonder at the gorgeous surroundings that will likely make the basis for his first long term memories.  Life is good.

20150211_100219

20150211_100233 (4)