Category Archives: Uncategorized

Sweetness and Thorns

It’s that time of year again…  Heading towards the warmest months of summer when the sweetest berries ripen.  And in this hottest time of the year, it also brings us back around to canning time.  Come January I’ll be trying to invent things that will heat up the kitchen like canning does, but in July and August… in our house without air conditioning… making jams and other preserves makes the house feel something like an Amazonian rain forest.  Only the love of jam, the availability of free (when you know where to harvest the wild thing, or have your own bushes) berries, and the desire to actually be able to pronounce the ingredients in your food would lead to such folly.  In short, I love it.  😉
20140725_110030

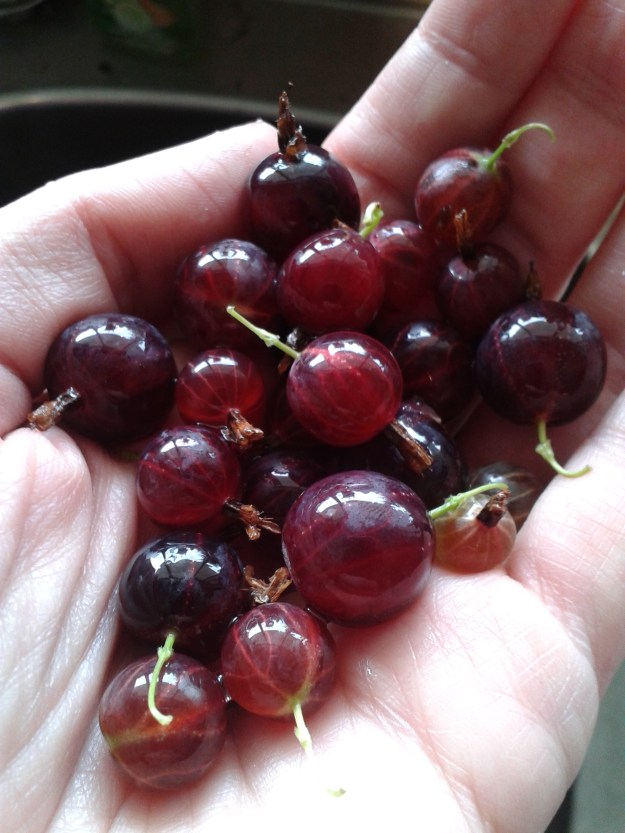
Gooseberries are some of the most beautiful berries ever.  They look jewel-like and the resulting jam… worth every single thorn.
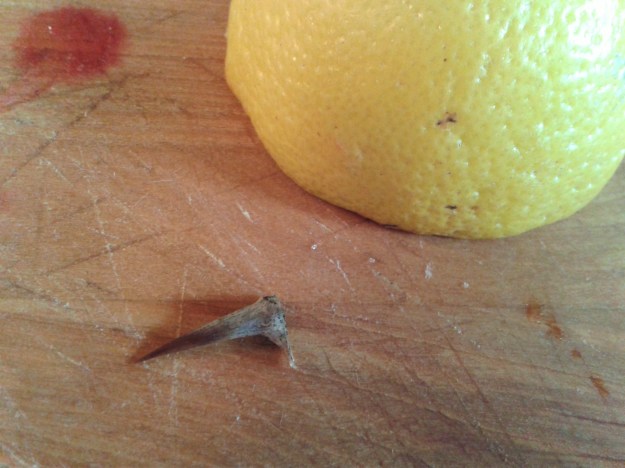
20140725_141835

I left the lemon half in the shot to give a sense of scale, but man… these little buggers can leave a mark.

Now my favorite berries, blackberries and blueberries, will not be ready for harvest for a couple more months.  The harvest season that is soon upon us, however, is that for the gooseberry.  This is not Dave’s favorite berry.  He likes the jam well enough, but this delicious jam comes at a prince, and a bloody price at that.  This rather innocent looking bush is studded with profoundly sharp thorns to protect its delicious produce.  These are not like the puny thorns that snag you from blackberry bushes, but gooseberry thorns are more like mini daggers that sink into your skin and will not let go.  Last year Dave was in Belgium on fieldwork when the gooseberries came ripe so it was only myself and Little Man to gather our berries.  He says it was academic work.  I think it was to avoid the gooseberries.

IMG_0010

Little Man was my gooseberry helper last year.  He brought one of his superhero action figures and played in the dirt, tossing in a few berries here and there.  His favorite part was dumping my “picking bucket” into the larger berry bowl.  Kids can help in lots of ways.

Besides the issue of harvesting the gooseberries, the berries will need to be stemmed and tailed.  This can be tedious, but I have found that doing this with a friend (or my husband) along with a nice cold beer (or maybe two, but remember you need to keep your wits about you if you are making the jam right after preparing the berries) makes the process a lot nicer.  If that does not help, just keep reminding yourself how amazing this jam tastes.  You truly cannot buy this flavor from the store.

20140725_110004

Removing the stems, tails and leaves from freshly picked gooseberries can be tedious.  Grab a friend and a favorite beverage and make the chore into something fun.

Making Gooseberry Jam
Ingredients

4 cups of gooseberries (stemmed and tailed)
1 ¼ cup water
1 lemon, juiced
4 cups sugar

Directions

  1. Prepare your canner, jars, lids and rings. Place a couple of small ceramic dishes in the freezer.  You will use these to test your jam’s doneness later.
  2. In a large stock pot or Dutch oven combine half of the berries, lemon juice and water. Bring the pot to a boil and cook the berries for 10 minutes.  Some of the berries will start to pop and the liquid will turn garnet red.
  3. Add the rest of the berries and the sugar to the pot and stir over gentle heat (about 10-15 minutes) until the sugar dissolves completely. Do not rush this part or the sugar can crystallize (aka bad mojo for jam).  Once the sugar grains are all dissolved bring the berries and sugar to a full, hard boil that cannot be stirred down.  Stir often for about 10-15 minutes with a long handled wooden spoon to ensure the jam does not stick or burn.
  4. To see if the jam has set, remove one of the chilled plates from the freezer and drizzle a little bit of the hot jam mixture onto the plate. Then tilt the plate to let the jam run.  If the jam firms up quickly and sort of crinkles on the top, then it is done.  If it does not firm up quickly, then let it continue to boil hard for a couple more minutes and test it again.  Keep going until you get the crinkles, then you are ready to fill.
  5. Once the jam is firming up well, remove it from the heat and skim off any foam. This can be set aside in a bowl to add to a nice piece of toast to celebrate your hard work.
  6. Fill and process your jars based on the manufacturer’s directions. I like to use wide mouthed 250 ml jars.
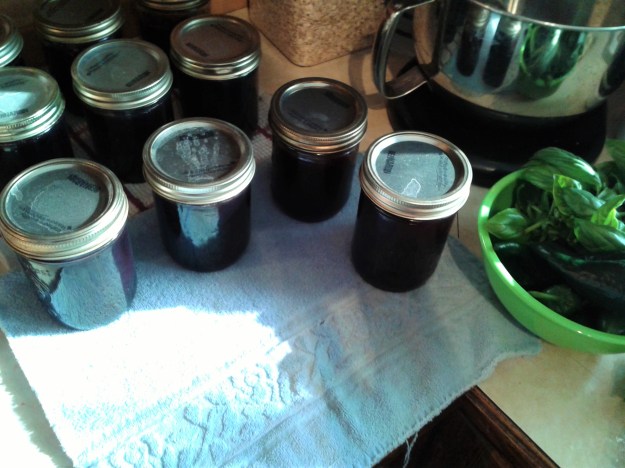
  7. After the jars are processed, set them aside to cool for 24 hours. Resist the urge to touch or move them during this time.  If any lids don’t seal properly, simply put those jars into the refrigerator and enjoy over the next couple of days.  The sealed jars can be stored for up to one year.

    Click here for a printable version of the Gooseberry Jam recipe.

  8. After the jars are cooled, clean them off and remove the rings. Label your jars clearly with the name of their contents and the date they were sealed.  Store the jars in a single layer in a dark, cool area.  Do not stack your jars on top of one another.  The reason you remove the rings is that if something went wrong with the canning and bad stuff is growing in there, the lid will lose its seal and pop open.  This food should be discarded and not eaten.  If you keep the rings on or stack something on top of your jars, then you cannot tell if a seal has popped.
20140725_182127

Gooseberry

The innocent little bush, just waiting for this years victims… I mean berry pickers…

A Waffle Kind of Morning

I think I’ve mentioned before that I might love breakfast just a little.  Or maybe a whole bunch.  I L-O-V-E breakfast, and will eat it for any meal of the day. While pancakes are a part of our regular weekend rotation of deliciousness, waffles are Little Man’s second favorite and frankly his preference could be bought depending on which one contains chocolate chips.  Those we save for super special days, however.

Like pancakes, when we first made the switch to gluten free-ish (Little Man’s issue is actually with not with gluten but with wheat, so we can use spelt flour that is low in gluten but not gluten free) I initially struggled with making a healthy-ish version that was also delicious.  One of the tricks I’ve found is that when dealing with low gluten or gluten free flours, a little bit of chia-meal or flax-meal goes a long way to creating the fluffy, bendable breakfast foods that we love.  Otherwise sometimes these gluten free or low gluten flours can be a bit friable or shatteringly powdery.  If you’ve eaten many things with straight up gf flour, hopefully you understand what I mean.  Not only does the chia or flax help make things bendable (gluten-like) It doesn’t hurt that they also add a great healthy boost to our beloved foods.  A boost that helps me think of these things as being healthy-ish… even with a healthy-ish dousing of maple syrup (the real deal please).

IMG_6027

Spelt Belgian Waffles

While this is “Belgian” in the North American style, these are not the waffles you’d find on the streets of Brussels. Beyond that, they are delicious! I make the entire batch at once, keeping them warm in the oven while cooking the rest. They are also great reheated from frozen. See the notes at the end for these instructions.

Ingredients:
2 cups spelt flour
¼ cup chia meal (see note)
4 tsp. baking powder
½ tsp. salt
2 cups milk (almond, coconut, cow, etc.)
½ cup canola oil
2 eggs, separated

Directions:

  1. Plug in and heat your Belgian style waffle maker. Turn your oven on to low.
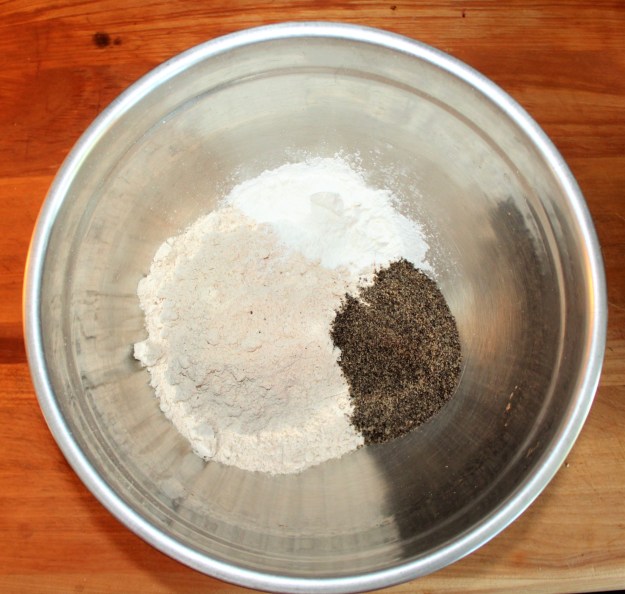
  2. In a large bowl combine the spelt flour, chia meal, baking powder and salt. Whisk the dry ingredients together to blend well.

    IMG_6002

    The chia meal looks like a lovely pile of black pepper here, but it will all blend in I promise.

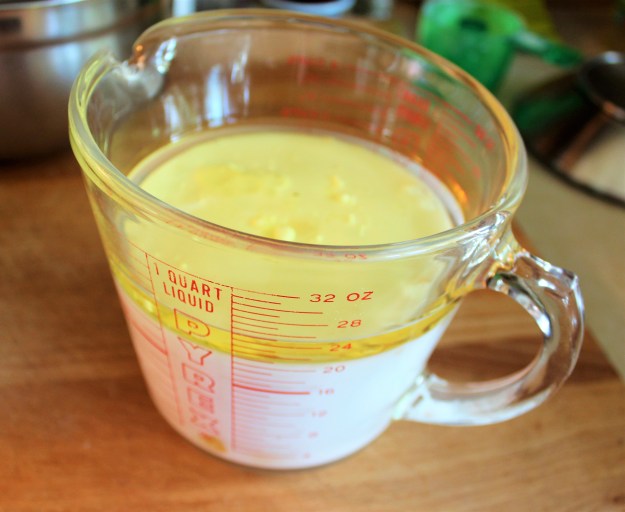
  3. In a large mixing cup or medium bowl combine the milk (almond milk is my favorite for these) and oil.

    IMG_6005

    I like to use a glass mixing cup large enough to hold all of my wet ingredients.  This one is a four cup measuring cup, so it’s perfect for this recipe.

  4. Get a small bowl for separating the eggs. Carefully break the eggs one at a time, dropping the whites into the clean bowl and the yolks into the milk and oil mixture. Set the whites aside for the moment.

    IMG_6003

    It’s hard to make a bowl of unbeaten egg whites look interesting.  Sigh…

  5. Use a fork or whisk to mix the wet ingredients together. Pour the wet into the dry and stir to combine. Set this aside.
    IMG_6008

    This doesn’t have to be a perfect emulsion, it just needs to be combined enough that there aren’t whole egg yolks floating around.

    IMG_6011

    Yup, the chia meal is still there peaking out at you, but these are whole grain waffles AND they taste fantastic.

  6. Using a hand mixer beat the egg whites to firm peaks. Fold the whipped egg whites gently into your waffle batter. There should still be a few streaks of white in your batter. This is what makes your waffles fluffy.
  7. Cook your waffles according to your waffle maker’s directions. For my waffle maker I use a ½ cup measuring cup to fill the griddle, close the lid and then flip the maker over. As the waffles finish cooking, I remove them from the waffle maker and put them in a single layer directly onto the rack of the oven. This recipe tends to make a total of 8 waffles that fills my oven in two rows of four.
  8. Any waffles that you don’t eat you can freeze. To reheat what I do is take one of the waffles out of the freezer bag, place it on a plate and drizzle about 1 tsp. of water over the waffle. Then I put this in the microwave for 10 seconds, and finally slide the waffle off of the plate into my toaster oven and toast it lightly. This gives me a warm, fluffy waffle that is crisply on the outside. If you don’t have a toaster oven, you can do the same thing with the broiler of your oven, but watch that waffle like a hawk. It can go from toasty to carbonized (aka burnt) in a second.

Note: Chia seeds lose their awesome oils quickly once ground, so try not to buy them pre-ground as chia meal. Instead, make your own by blitzing chia seeds in a coffee grinder or food processor. You can do the same with flax seeds to create a flax meal. Store any extra chia (or flax) meal in the freezer to keep it fresh. I generally use the black chia seeds since I can find a good organic version. There is also a white chia version that would work just as well.

P.S.

Yes, I just posted a photo of the inside of my oven on the internet.  Please don’t judge.  If you are my mother or mother-in-law, avert your eyes.

Click here for a printable version of the  Spelt Belgian Waffles recipe.


Hummus Update

We are still recovering from what was likely the worst hummus misfortune since recorded time, and for an archaeologist that is saying something.  Ugh!  Between the two of us and a typo in my online hummus recipe, we created a monstrosity that could not be fixed no matter how hard we tried, no matter what spices we threw at it, no matter how much encouragement Little Man gave us.  Hopeless, yet memorable.  Oh, how memorable…

So I’ve updated the online Marie’s Hummus recipe, and all should be good now.  If you tried it before and it didn’t taste right (sorry!), I’ve fixed the recipe.  As for our household, we’ll be giving the hummus another shot tomorrow after I replenish my lemon juice supply.  Also, as a note to anyone interested, if you run out of lemon juice do NOT try to replace it with cider vinegar.  Like I said, it was memorable…  😉

“Sort of” Migas: A Fast Meal for Busy Days

This dish is one of those “go to” meals for an evening when there just isn’t enough time or energy to do something from the regular routine.  The inspiration for my “Sort of” Migas came from reading one of my favorite blogs, Smitten Kitchen.  In the post I was reading, Deb Perelman described a dish of Migas and from her description I knew I had to try it.  At its most basic form, Migas are scrambled eggs with spicy ground meat and tortilla chips all cooked together.  Deb’s Smitten Kitchen version was an amazing Migas with a Spicy Tomato Chipotle Coulis.

While the Smitten Kitchen version of Migas sounded phenomenal, I didn’t have the energy to even consider making it all from scratch.  In fact, when I stumbled onto Deb’s recipe I had been quickly perusing the internet in a desperate search for inspiration for a fast meal using ingredients that I actually had at home.  Now while I love living on Vancouver Island, finding good Mexican food has proven… shall we say… difficult.  This is the first place that I have ever lived where you cannot buy corn tortillas.  Seriously.  No where on the island… Doh!  This is a long way to say that I am in constant longing for good Mexican food, and therefore have to make it at home.  When I read the Smitten Kitchen post, I knew that I wanted those Migas and that if I stripped it down to its basic ingredients I could pull it off.

That said, please know that my “Sort of” Migas are not authentic in any stretch of the imagination.  Instead of Mexican chorizo I use well-seasoned ground turkey.  And I use jarred salsa.  Need I say more?  What is missing in authenticity, however, these “Sort of” Migas make up for in great taste.  They are fast, delicious, and have been endorsed by Little Man.  Enjoy!

“Sort of” Migas
Ingredients
:
1 tsp. olive oil
½ lb. ground turkey
1 tsp. garlic powder
1 tsp. chili powder
1 tsp. ground cumin
1 tsp. ground coriander
Salt and pepper
6 eggs, beaten
4 cups tortilla chips
1 small jar salsa

Directions:

  1. Heat a large non-stick skillet over medium high heat and add the olive oil. When the oil is hot add the ground turkey and break it apart with a wooden spoon. Add the garlic powder, chili powder, cumin, and coriander, stirring to combine the spices with the ground turkey. Add salt and pepper to taste, continuing to stir and brown the meat until it is well cooked, about 7-10 minutes.
    It's just not easy to make raw ground turkey look nice in a photo.

    It’s just not easy to make raw ground turkey look nice in a photo.

    Since the ground turkey is taking the place of Mexican chorizo, you need to add a lot of spice.  I dialed down my spice inspirations so that it would still be Little Man safe.  If you don't have to keep spicy-timid taste buds in mind, feel free to add some cayenne or chipotle.

    Since the ground turkey is taking the place of Mexican chorizo, you need to add a lot of spice. I dialed down my spice inspirations so that it would still be Little Man safe. If you don’t have to keep spicy-timid taste buds in mind, feel free to add some cayenne or chipotle.

  2. Lower the heat to medium low and add the beaten eggs. Stir the eggs in the seasoned turkey to scramble the eggs. When the eggs just start to set add the tortilla chips and stir to coat the chips in the turkey and egg mixture, breaking some of them while stirring. When the eggs are set remove the pan from the heat.
    Add in the beaten eggs and let then sit for just a moment to start setting up.

    Add in the beaten eggs and let then sit for just a moment to start setting up.

    When the eggs start to come together, then you can add the tortilla chips.

    When the eggs start to come together, then you can add the tortilla chips.

    When you add the tortilla chips to the pan, don't be afraid to break them up a bit.  This isn't a dainty dish, so you don't need to be gentle with the ingredients.

    When you add the tortilla chips to the pan, don’t be afraid to break them up a bit. This isn’t a dainty dish, so you don’t need to be gentle with the ingredients.

    Here is Little Man's portion on one of his planet plates.  It didn't look like this for long as he dug right in.

    Here is Little Man’s portion on one of his planet plates. It didn’t look like this for long as he dug right in.

  3. Serve the “Sort of” Migas with the salsa and remaining chips.

Click here for a printable version of the “Sort of” Migas recipe.

"Sort of" Migas

An Update on the Garden

I guess you could call this a self portrait of sorts.  I loathe to use the term “selfie,” and in this case would it even count as a “selfie” if I only took one shot rather than dozens?  But there it is, my shadow in the lower left corner of the shot.  The sun was lowering perfectly to drape my garden in golden light, but also perfectly so that I couldn’t get a picture (with my phone no less) without my shadow in it.  So selfie it is.

The garden is growing in exuberant bunches of greens.  Farm kids in Iowa would talk about how in the peak growing season for corn you could actually hear the corn stalks growing, a sort of breeze-like, reedy, squeaking.  I cannot hear my garden growing, but I like to imagine the leaves creaking as they unfurl farther; the squash blossoms opening their maws; and the sunflowers, tomatoes and runner beans snaking at what seems like an unnatural speed.  Yet it is all the definition of natural.  There are days when I come outside shocked by the riot of green  in my backyard.  Runner beans that have literally grown a foot over night.  Rows of chard and kale that I had just brutalized (aka thinned) the day before and that had grown back with leafy vengeance.  And don’t even get me started on the squash hill that centers my garden plot.  Oh my…

I’ll get back to the greens in another post, but today is just about a brief celebration of abundant greenery.  Little Man’s favorite time of day, other than cuddling with Mommy or Daddy while sipping juice (heavily watered down) and watching a little bit of TV after nap time, is when I’m watering the garden.  He gets his “work boots” on and gets to tromp through the garden plots, moving as I move the oscillating sprinkler, shrieking in his three year old voice “Is this the shower I’m looking for?” as he runs back and forth through the arching rainbow of water.

"Is this the shower I'm looking for?" squealed Little Man.

“Is this the shower I’m looking for?” squeals Little Man.

And please note the crazy bunch of greenery in the lower left corner of my garden plot in the photo with Little Man dashing through the water.  If you remember a recent post of mine (Even if You Are a Killer of Plants) on growing salad greens in a container, this is what happens when you let them loose in the ground and really spread their roots.  I just attacked that garden last night to make lettuce wrapped hoisin chicken for our dinner guests, so it isn’t quite as fluffy today.  But only just slightly less.  I picked a massive overflowing bowl of greenery, and this morning the plants had spread their remaining leaves and replaced them seemingly by magic.  I shudder at the thought of ever having to buy lettuce again, but since we don’t have a southern California growing season (aka year round garden access…  not that I’m jealous… OK, I’m a little jealous), at some point this good thing will come to an end.  Oh bother.

In the meantime we are all reveling in our first ever “real” garden that is not in containers, though we have those too.  It’s fun to think about all the ways that we have grown as individuals, as a family, as immigrants, and as first time gardeners in this last year. It sets the bar pretty high for this current year…

Selfie

Super Women or Women in Hiding?

This post was inspired by a wrenchingly intimate post by Aarti Sequaria (of Aarti Party on the Food Network) about her struggles with Postpartum Depression (PPD).  The post is entitled “Coming Out of the Fog” and it is definitely worth reading.  The post isn’t graphic or shocking, but in many ways it is a soul baring statement exposing what she initially thought was a weakness or personal deficiency.  I knew I wanted to share this post with my female friends in case any of them or their friends/family were struggling with PPD.  That’s when I got mad.

I cannot speak to what it is like for men in our society, though I have witnessed some of the intense stresses that my amazing husband and wonderful brother have dealt with trying to be the best men they can be.  I can, however, speak to the pressures of being a woman.  I got mad about sharing Aarti’s post because based on the statistics it is likely that one of my friends has suffered (or is suffering) from PPD and I don’t know it.  I got mad because there are so many things that as women we feel we must keep quiet about because otherwise it makes us look week or less than perfect.  So we swallow it down, put on the Superwoman face, and try to present a perfect Pleasantville face to the world.

My reading of this article coincided with a meeting I had with a friend whose job is to help academics get jobs at her university.  I met with her to talk about how to best position myself for getting back into the university professor job market after my time off with Little Man.  During our meeting she spoke about the “lie of feminism,” and as a feminist I was shocked by the statement.  She continued, talking about the lie that she and other women of our generation were told in college; that we could have it all, career and family.  “Don’t get me wrong,” she said, “we can have it all, just not at the same time.”  Ah…  So there’s the difference.  We can have it all, career and family, but we don’t have to do it all perfectly at the same time.  Relax.  Breathe.  Here we go…

My career-building friend advised that rather than trying to be a Superwoman of perfect proportions (physical and otherwise), it was better to find a way to “balance the guilt” of trying to balance career and family.  Something has to give.  You cannot be the perfect career woman, perfect mom and perfect homemaker all at once.  Not without breaking or lying.  You have to make choices that allow yourself to be less-than-perfect in some of these areas and then learn to balance the guilt of these imperfections.  This is especially true when the kiddos are young.

A great example that my friend used was a film called How Does She Do It? starring Sara Jessica Parker.  I haven’t seen the film, but she described a scene in which the mom/career woman is invited to a dinner at a friends house and is asked to bring a dessert.  With all of her family and business responsibilities the woman doesn’t have time to make an apple pie, so she buys one from the store and then distresses it to make it look homemade.  I haven’t seen the film, but for that scene alone I want to see if my library has it.  By the end of the film she learns that she doesn’t have to be a Superwoman, and the next time she is invited to a friend’s for dinner she brings the pie in the bakery box.

So that is my rant, bouncing around from women hiding their imperfections, trying to live the lie of feminism, and often hiding these issues from those who love us best.  I’ve written before on this blog about how two weeks after Little Man was born I was back in the classroom teaching full time (My 50th-ish Post).  I put on the Superwoman face and didn’t share with any of my friends the stresses that I was going through.  Only my amazing husband knew the stresses I was facing, for everyone else I presented the best Superwoman face that I could, though it was often slightly smeared with baby spit up.  I have a couple of course lectures that deal with eating disorders and I speak to those classes about how statistically it is probable that one or more students in that room are struggling with eating disorders.  Now it’s my turn.  Forget about the social network “friends”, in our smaller group of friends that we see face to face on a regular basis, it is probable that one of them has suffered from Postpartum Depression, from a miscarriage, from failure to get pregnant, from a cheating spouse/partner, from some other “failure” that she is ashamed to admit even to close friends and family.  I’m frustrated that it takes posts from well-known strangers to allow us to share intimate and important things that we struggle with.

There’s the soapbox for today.  I’m done.

A Tale of Two Parties: Celebrating a Graduation in Style

Let me begin by stating how proud I am of my husband for completing his Ph.D. in Anthropology!!!  Done baby, done!

Here comes Dr. David Hopwood.

Here comes Dr. David Hopwood.

Many of us are familiar with celebrating high school and university graduations, but when you start getting to the advanced degrees the line that marks when you are done can be tricky to find.  Dave and I both earned our doctorates (how cool is that to say!) from Binghamton University, State University of New York.  At Binghamton University the completion date of your doctoral degree is when you have a public presentation to “defend” your dissertation.  This date can happen any time during the year, as long as you are done and your committee can attend.  So not only does your degree often finish at a random point on the calendar, it is also a singular accomplishment… meaning that you are not completing with anyone else and certainly not with a class of hundreds of fellow students.

I remember leaving my defense feeling elated about having passed that hurdle, stepping outside of the Science 1 building and looking around to seeing life continuing for everyone else as if nothing had happened.  The same students rushing to class already late, the same fervent clutching of coffee mugs, the same professors avoiding eye contact with students so no one asks them if the exams are graded yet…  My entire universe had just changed, but the rest of the university trucked on as if nothing had happened.  I wanted a parade.  I wanted acrobats flipping down the pathways, people blowing fire from the library fountain, fireworks from the clock tower, and sparklers for every single person on campus.  Alas, all I got was tepid coffee from an indifferent barista who was studying her note cards furiously behind the counter.

So when Dave was finishing his dissertation I started dreaming about how we’d celebrate his incredible accomplishment.  Needless to say that I was dreaming big, and when the actual date came around I had to seriously scale myself back based on budget (sorry, no acrobats) and my available time (aka how to I pull off a great party with the time available to a stay-at-home mom with a young child… aka not a lot of “free” time).  A number of my ideas had to fall by the wayside, but I think I was able to pull off my main goal of truly honoring all of Dave’s hard work.

Dave and three of The Ladies wearing the amazing construction paper grad caps.  From left to right: Loree, Sue and Ruth.

Dave and three of The Ladies wearing the amazing construction paper grad caps. From left to right: Loree, Sue and Ruth.

I was not the only one wanting to celebrate Dave’s graduation, and the lucky boy was also honored with a party at his family’s home.  The two parties were a week apart and were completely different from each other except for the fact that they were both filled with people who wanted to celebrate Dave.  He’s going to be impossible to live with after receiving weeks of unbridled praise!  😉  Just kidding.  He deserved every word and more… but I digress.

Hand poured chocolate graduation pops.  Ruth made dark chocolate, milk chocolate, mint chocolate and white chocolate.

Hand poured chocolate graduation pops. Ruth made dark chocolate, milk chocolate, mint chocolate and white chocolate.

While all you see is the "jewel" topping, this was the most amazingly rich and moist berry cake I've ever had.  The berries on top looked like a glittering tray of jewels. Stunning!

While all you see is the “jewel” topping, this was the most amazingly rich and moist berry cake I’ve ever had. The berries on top looked like a glittering tray of jewels. Stunning!

Special ordered celebratory pencils.

Special ordered celebratory pencils.

These diplomas were actually fun trivia questions about Dave and is degree.  Winner gets a prize!

These diplomas were actually fun trivia questions about Dave and is degree. Winner gets a prize!

We had such a great time at both parties.  Some of my favorite parts of Dave’s Family’s party were the special things they made by hand.  They made amazing construction paper graduation caps for everyone to wear, hand decorated graduation cap cookies, and had two young women to play with the kids and do crafts downstairs allowing the parents to be adults upstairs.  It was fantastic!

These cookies must have taken days!!! Each one was baked by Ruth and hand decorated by Erin.  I think they should go into business with these.

These cookies must have taken days!!! Each one was baked by Ruth and hand decorated by Erin. I think they should go into business with these.

The amazing spread at Dave's New Westminster party.  The wolves would fall on this table soon, so we had to take the picture fast.

The amazing spread at Dave’s New Westminster party. The wolves would fall on this table soon, so we had to take the picture fast.

We were also able to hold our own Hooding Ceremony.  In a traditional doctoral graduation ceremony the graduate is “hooded” with the special colors of your degree by a mentor or advisor of your choice.  This is a leveling of the playing field, and a very special moment of being brought into the professional field that you have worked so hard to attain.  Since we couldn’t get out to New York for Dave’s graduation, we held our own hooding ceremony at his party and it was my honor to be able to hood Dave.

Done, Baby... Done!

Done, Baby… Done!

A toast by Dave's proud dad, Joe.  This is where we all lost it.

A toast by Dave’s proud dad, Joe. This is where we all lost it.

I know that I’ve been teasing people with promising to post recipes from our Vancouver Island party on this blog, but I had to share the New West party first.  Stay tuned and the next post will start the recipes, I promise.  But first…  Sometimes we get so wrapped up with our own ideas of what our graduations mean to us personally that we forget about all that our families and loved ones have invested in the graduation as well.  This graduation for Dave coincided with his return to Canada as a university professor,  a husband and a dad.  A lot has changed since Dave first left for graduate school in New York.  The party in New West was an amazing time to also honor Dave’s family and their own achievement in getting their son/brother graduated.  Cheers to all you Hopwoods!

Decorations

A Jaunt Between Countries: More Adventures in Immigration

This last week was more adventure in immigration, and it involved a relatively short speed walk between countries.  This jaunt is called “doing a flag pole” by immigration officials on both sides of the border and is now another thing to add to my list of accomplishments.  Please forgive the lack of images with this post, since they tend to frown upon camera usage at the border.

The back story is that I needed to get a work permit for an upcoming job that I’ll post about later this week.  So stay tuned for that.  🙂  Now back to our story…  For some reason that must have made sense at some point to someone, to get a work visa one must first walk from Canada to the States, “do the flag pole,” walk back to Canada, and apply for the permit.  Other than ensuring that a person has the stamina to travel by foot from one country to the next, or to reinforce your complete powerlessness as an immigrant and the need to dance like a monkey on command, I’m truly not sure why this was required.  But this is our saga of the flagpole…

It began with an early morning ferry ride to the mainland where the three of us were gratefully met my Dave’s mom, our fellow adventurer for the day.  Then we drove to the border.  This was the closest I’ve been to my home country in almost a year, and even though I wasn’t actually going to enter the States, it was fun to get close to it again.  As we got closer I also started to get a bit nervous about how this was all going to play out.  When one’s immigration status is in question it can be a bit nerve wracking to leave one country for the next for fear of not being allowed back in.  So I took a deep breath, clutched my passport a little bit tighter, and prepared to dance.  That’s when things got interesting.

Most visitors at the border are simply trying to get from one side to the other.  They’re not trying to find a place to park in order to ask how one legally walks across international boundaries.  Needless to say we missed the tiny sign showing us where to park and ended up stuck in about 20 minutes of stopped traffic on the way to the States.  At this point we realized that we were about a block away from the actual border and that there was no where to go but forward, meaning that we were driving into the States.  This is also the time when we realize that the only person in the car with a passport is me, and Little Man has no documentation at all.  Nervous laughter ripples through the car.  We luckily spotted a “hail Mary” turnaround spot for people like us that just happen to make a wrong turn that could lead them to a different country.

Now we were pointed back towards Canada, figured we had at least one satellite watching our car for the lovely u-turn maneuver, and had the pleasure of sitting in another 20 minutes of stopped traffic to get back to the Canadian border.  At the border station we were “greeted” by the surliest Canadian any of us (the Canadians included) have ever encountered, and told that I have to go back the way I’ve come, but that there are no side walks so I need to be careful of the cars.  Great…  So now I need to “do the flagpole” and avoid being run over by someone desperate to get to Trader Joe’s and who sees me as literally standing between themselves and their $2 Chuck.

So off I go, traipsing between cars with a backpack full of documents while my family plays in the park behind me.  I try to avoid eye contact with any of the drivers, only thinking what a strange sight I must make walking down the street to the border, and feeling rather pilgrim-like.  Nothing like a 10 minute speed walk while inhaling the exhaust of countless cars to make one feel ready for the task at hand.

Once at the U.S. border office I asked a border agent about which line I should be in since I’m not actually trying to enter the country, but just need a work permit.  He said that for “a flag pole” I needed the back line.  The back line was a row of bench seating along the wall that looked like it hadn’t moved in about an hour.  I got in line, and eventually realized that I’m not in line at all, but am sitting with other people from other lines that simply got tired and needed a seat.  Once I realized my error and got into my line, I was second in line and was eventually asked to hand over my passport and take a seat.  Fifteen minutes later I was given my passport back with a stamp and told to walk back to Canada.  Apparently my “flag pole” did not involve an actual flag pole, and I have to say I’m a bit disappointed in that.

However, not one to question border agents who are letting you go, I left the building and started to walk around it the other way to continue my circuit back to Canada.  Who else can get lost trying to walk back to Canada?  Is it possible to miss an entire country?  I ended up in the loading dock and had to turn around.  A passing border agent looked at me, shook his head, and pointed the other way back to Canada.  Perhaps if you can’t even figure out the direction to walk back to Canada, the States isn’t particularly sad to see you go.

Off I went again, this time swimming up current from the cars and on the side to Canada actually finding a sidewalk.  How civilized.  I should also point out that I hadn’t noticed the slight decline for my walk to the States, but the walk back to Canada was up hill all the way.  That’s when I started feeling all the sore muscles from the different yoga warrior positions, and the dolphins… those darn dolphins…

In about the same 10 minutes it took me to walk to the States, I walked back to Canada and was greeted again on the Canadian side by the same surly border agent as before.  This time he asked me more surly questions, scribbled something on a yellow ticket, told me to walk to the tree, turn left, enter the building and go to the second line.  While I may not have circled a flag pole in the States, I did circle a maple tree in Canada.  That somehow felt right.

It was on the Canadian side where things got interesting again.  They didn’t want to give me the permit since it was something I could get from an office on the island, even though there were no immigration offices on the island hence our ferry trip to the mainland, and I was missing some information they needed.  Specifically they needed the start and ending dates for my employment since the permit would only be good for that one job with that one employer.  The dates weren’t listed on my offer letter and I hadn’t come prepared to call the anthropology department, so I looked briefly at the offer letter’s letterhead and asked the border agent if I could call the office to get the dates.  I was given permission and dialed the number hoping the department secretary was not at lunch.  The person who answered the phone was not the department secretary, but instead the Department Chair who also just happened to be a former mentor of mine.  This is exactly the impression you want to give your future employer before you even start your job, that you are having immigration issues, and you need them to do write a memo and fax it to the border asap (please), and I look forward to seeing you again in the Fall.  Ugh.

The second issue that the border agent had with me was that she wanted to see my credentials that allowed me to do this job.  For this I was prepared.  I reached into my backpack, grasped the tome that is my dissertation and laid it down on the counter with a satisfying and resounding thunk.  Yes, it would have been easier to bring my diploma, but that is packed in on of the 20 boxes labeled “Office” while the dissertation was nicely displayed on my bookcase.  This is the most work my dissertation has had in years, being carted around from one country the next, and then placed with a pleasingly heavy thump on the border agent’s desk as evidence of my credentials.  Nerdishly satisfying.

In the end the fax came through, the dissertation was accepted, and the permit was awarded.  Little Man was given a paper Canadian flag, and off we went again with no sidewalks or crosswalks, trying to reach our car on the Canadian side so we could go home, dodging drivers anxious to leave the States with their Trader Joe’s bounty.

Later when we had reached Ruth and Joe’s home, had gotten Little Man down for a nap, and were all happily ensconced in the kitchen holding glasses of crimson refreshment, we regaled Joe with our adventures.  I had successfully power walked between countries, did “the flagpole” and am now one step closer to an upcoming job.  Just one more political hoop to jump through, but that’s an adventure for next week.  In the meantime, we’re enjoying the success of this initial foray, and hoping that I don’t have to do that particular immigration hoop again.  Please!

A Sick Snow Day

This week dawned bright and sparkly on a few inches of unexpected (at least to us) snow.  These were the sights that greeted me when I stumbled out of the house on Monday morning with an old cardboard box to gather wood from our shed for the day’s fire.  I’d forgotten to tuck my pants legs into my sorely misused Uggs, and would have wet, cold ankles for a bit once I got back inside, but the beautiful pink light from the morning sun coming over the dusted pines made me forget about that.  The farmer’s dog hadn’t been let out yet, so our snow was still pristine, without dog footprints or other offerings.

Snow-frosted fencing curled up around the border of our back yard.  Just waiting for Spring so the garden beds and "real" fencing can be put in place.

Snow-frosted fencing curled up around the border of our back yard. Just waiting for Spring so the garden beds and “real” fencing can be put in place.

Unfortunately this was not just a snow day, but a sick day with our toddler totally knocked out with the flu.  It was almost with tears that we had to turn away the farmer’s daughter when she came to see if Little Man would like to go sledding.  He, of course, said “yes!” through a fit of fevered coughing, and almost succeeded in rolling off the couch towards the door.  We’ll have more chances for sledding later, once he’s fit as a fiddle again.

A view of our little summer "gazebo" bench, and the lone Canadian flag windsock.  A nice punch of color for our white and black landscape.

A view of our little summer “gazebo” bench, and the lone Canadian flag windsock. A nice punch of color for our white and black landscape.

In the meantime, when Little Man did have enough energy to roll off the couch he decided he wanted to “decorate the floor.”  He’s done smaller versions of this on the dining room and living room tables, but nothing quite to this extent before.  If anyone had the audacity to walk into the living room while he was working, they were greeted with a firmly outstretched toddler hand and a croaky “don’t step on my cars!” warning.  We’ll get back to practicing kind words later, but on this sick day we let the mini-artist have a bit more leeway as he looped and swirled his cars and other precious toys around the rug.

Little Man's rug "decoration."

Little Man’s rug “decoration.”

All in all, it was one of the best sick snow days I’ve had… especially since it wasn’t me being sick.  Now that we’re in February, we enter the anxious waiting period for Spring.  I know I can’t expect it to come too soon, but I keep waiting and plotting the things I want to plant in the garden this year.  Little Man has already requested that we plant carrots for his stuffed fox and Cheezies for his stuffed bear.  For some reason I think we’ll be more successful with one than the other.  I’m just trying to figure out something else we can plant that will get him excited to eat things from the garden, even if it won’t produce artificially cheese-flavored snack chips like he hopes.

IMG_0006

Making More Bath Soap

I hate it when this happens, but now I can’t find the original site where I got this idea from.  The idea is so awesome, however, that I have to share it.

I don’t know about the rest of you parents out there, but I feel like we go through Little Man’s foaming body wash and shampoo like mad.  Then I saw the post (which I cannot find… doh!) about how to more or less create your own foaming soap.  This is one case where I’m not going out and to get the raw ingredients I need to create something, but instead am just making something I already have stretch farther.  I love it!

All you need is an empty foaming soap dispenser and your favorite brand of non-foaming child’s body wash/shampoo.  Pour enough of the body wash into your empty container to fill it about 1/4 of the way full.  Then carefully fill the rest with cool water, leaving enough air at the top of the bottle so that the lid can be reinserted and the contents mixed without spilling.  Then reinsert and secure the lid, and gently tip the bottle up and down until the soap and the water are mixed together.  Resist the urge to shake the bottle as all you will do is make bubbles.  Then use your new foaming bath soap as normal.  Brilliant!  My heartfelt thanks go out to that mystery blogger who gave me this great, money saving idea!

And if you have any other cool ideas, please feel free to share.  I’m all for things that make life easier… and less expensive.

CIMG2182