Starting from Scratch

What you see in this picture is not edible.  Well, actually it is, but it isn’t meant to be.  Let me start again…

About a year ago I started removing artificial chemicals from my home and body as I could.  I had finally had enough.  I’m tired of hearing again and again about how a trusted company or product is now found to be not only be unhealthy to use, but in fact might be down right harmful.  Enough.  I’m not going off grid (not exactly sure what that means) or embracing my inner Puritan (I don’t have one), but little by little, where I can, I’m getting rid of the stuff that I can’t pronounce and have no idea what it is or why it’s going on my body.

Frankly this goal was also driven by my budget.  As a Sessional Instructor (aka Adjunct Professor) my employment is not guaranteed, and we need to be careful with spending.  I was having a harder and harder time justifying the crazy cost of multiple moisturizers to be used at different times of day or on different parts of the face all promising different paths to eternal youth.  Fighting free radicals, etc..  The list of things that these facial creams are supposed to do make them sound like members of the Avengers.  If that was true, Little Man would be impressed.  I, however, was not.

So I decided to start someplace simple, my face cream.  The first time I tried this, I simply melted some coconut oil and added a few drops of essential oils.  That was fine, but didn’t have the same pampering feel that my nice, expensive and unpronounceable face cream from the store had.  Then I tried it again with a bit of shea butter added in, and after some internet research found that this concoction could be whipped with a hand blender.  Oh yes, DIY whipped face cream from ingredients that I for the most part I already had in the house.  Sold!

One note about this face/body cream… a little goes a long way.  I use this twice a day on my face, as well as all over my body.  For the face especially you only need a tiny amount.  If you use too much, depending on your skin type, your skin will feel slick.  I like to use it in the morning right after cleaning my face, and I wait a fair bit of time (oftentimes until after I’ve eaten breakfast) before applying my make up.  Another friend of mine found that in the morning her face stayed too slick, so instead uses this as a night cream for her face and as an overall body moisturizer.  It is especially great for dry feet and elbows.

The whipped face cream is incredibly easy to make.  Here is what I do:

Whipped Face/Body Cream
Ingredients
:
½ cup coconut oil (preferably organic)
½ cup shea butter
5-15 drops of essential oils (lavender, cedar wood, and frankincense are my favorites)
1 cup-sized container with tight fitting lid

Directions:

  1. Put the coconut oil and shea butter into a metal bowl, and then set this bowl into a second bowl filled with hot water. Otherwise you can use a standard double-boiler, or use a microwave safe bowl and melt the oil and butter using short, 30 second bursts.
  2. When the oil and butter are almost melted, stir them together until everything is clear. Remove the metal bowl from the hot water and set it aside to cool.  Do not add essential oils to anything hot since that will destroy many of their healthful properties.
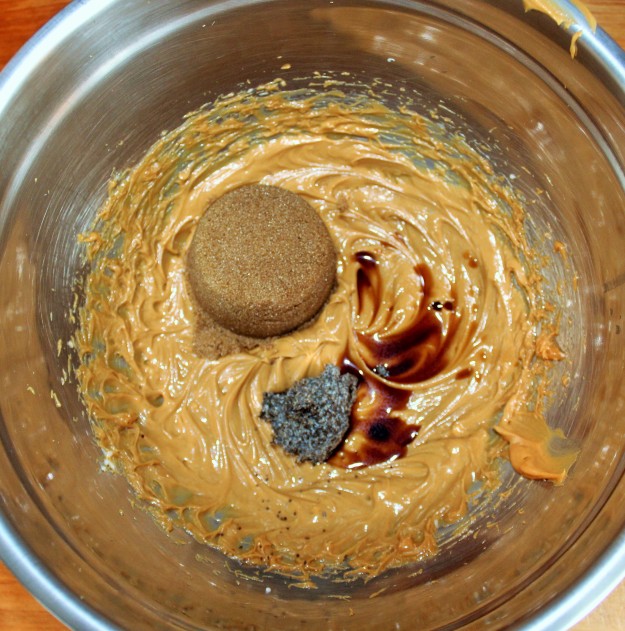
  3. Once the oil/butter mixture is cooled (but not set) add your essential oils. I like to do a blend of about 5 drops each of my favorite oils for skin.  My current favorites are Lavender, Frankincense, and Cedar Wood.

    IMG_8865

    For this batch in the picture I used Lavender, Frankincense, and a Young Living blend called Progessence.  I often use Cedar Wood instead for my third oil.  I use Young Living oils for their purity and high standards of production and sustainability.  If you are interested in where to purchase Young Living Oils, you can send me a comment through this post.

  4. Depending on the temperature of your room (and the amount of time you have), place the metal bowl into the refrigerator (or freezer for a quicker set) until the oils just start to harden or set.
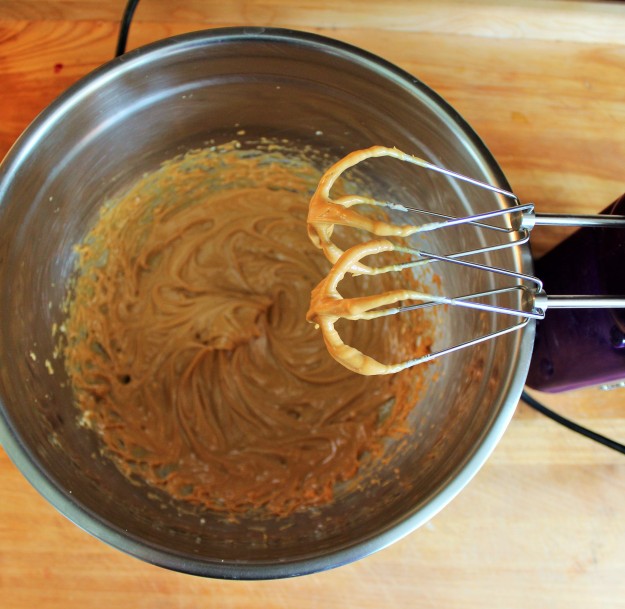
  5. Remove the bowl from the refrigerator and use an electric hand blender to whip up the oils until light and fluffy. If your oils are still too warm, put them back in the refrigerator or freezer for a couple of minutes then whip them again.  Watch it like a hawk or it can set up too quickly.  If the oils have solidified before you whipped them, try your blender anyway.  You might need to use a spoon to scrape the mixture into smaller bits and then blend away.
  6. Put the finished face/body cream into your container of choice with a tight fitting lid. I keep my face lotion on my bedside table, so I use a small, wide-mouthed mason jar.  For face/body cream that I would travel with or take to the gym, etc., then try a food-safe plastic container with a tight-fitting lid.

* You can double this recipe to make two jars of face/body cream and then save one in the refrigerator.


Young Living Essential Oils Distributor: 3025584
Check out Young Living essential oils at youngliving.com

What I like to do now is to make two jars of the cream at a time.  One I use immediately, and the other I keep as a replacement.  That way I didn’t have to rush to make more when one was getting low.  Also, if you are doing this in the summer or live in a perpetually hot area, you might want to store your face cream (at least the replacement one) in the refrigerator.  While our summer here on the island has been a mild one, normally by mid July all of the coconut oil in my house has liquefied in the heat.  I still used my coconut oil face cream when that happened, but I prefer the fluffy, whipped cream.  And frankly, in that type of summer heat to have the face cream cool when I put it on… sounds perfect!

Click here for a printable version of the Whipped Face Cream.


Sweetness and Thorns

It’s that time of year again…  Heading towards the warmest months of summer when the sweetest berries ripen.  And in this hottest time of the year, it also brings us back around to canning time.  Come January I’ll be trying to invent things that will heat up the kitchen like canning does, but in July and August… in our house without air conditioning… making jams and other preserves makes the house feel something like an Amazonian rain forest.  Only the love of jam, the availability of free (when you know where to harvest the wild thing, or have your own bushes) berries, and the desire to actually be able to pronounce the ingredients in your food would lead to such folly.  In short, I love it.  😉

20140725_110030

Gooseberries are some of the most beautiful berries ever.  They look jewel-like and the resulting jam… worth every single thorn.

20140725_141835

I left the lemon half in the shot to give a sense of scale, but man… these little buggers can leave a mark.

Now my favorite berries, blackberries and blueberries, will not be ready for harvest for a couple more months.  The harvest season that is soon upon us, however, is that for the gooseberry.  This is not Dave’s favorite berry.  He likes the jam well enough, but this delicious jam comes at a prince, and a bloody price at that.  This rather innocent looking bush is studded with profoundly sharp thorns to protect its delicious produce.  These are not like the puny thorns that snag you from blackberry bushes, but gooseberry thorns are more like mini daggers that sink into your skin and will not let go.  Last year Dave was in Belgium on fieldwork when the gooseberries came ripe so it was only myself and Little Man to gather our berries.  He says it was academic work.  I think it was to avoid the gooseberries.

IMG_0010

Little Man was my gooseberry helper last year.  He brought one of his superhero action figures and played in the dirt, tossing in a few berries here and there.  His favorite part was dumping my “picking bucket” into the larger berry bowl.  Kids can help in lots of ways.

Besides the issue of harvesting the gooseberries, the berries will need to be stemmed and tailed.  This can be tedious, but I have found that doing this with a friend (or my husband) along with a nice cold beer (or maybe two, but remember you need to keep your wits about you if you are making the jam right after preparing the berries) makes the process a lot nicer.  If that does not help, just keep reminding yourself how amazing this jam tastes.  You truly cannot buy this flavor from the store.

20140725_110004

Removing the stems, tails and leaves from freshly picked gooseberries can be tedious.  Grab a friend and a favorite beverage and make the chore into something fun.

Making Gooseberry Jam
Ingredients

4 cups of gooseberries (stemmed and tailed)
1 ¼ cup water
1 lemon, juiced
4 cups sugar

Directions

  1. Prepare your canner, jars, lids and rings. Place a couple of small ceramic dishes in the freezer.  You will use these to test your jam’s doneness later.
  2. In a large stock pot or Dutch oven combine half of the berries, lemon juice and water. Bring the pot to a boil and cook the berries for 10 minutes.  Some of the berries will start to pop and the liquid will turn garnet red.
  3. Add the rest of the berries and the sugar to the pot and stir over gentle heat (about 10-15 minutes) until the sugar dissolves completely. Do not rush this part or the sugar can crystallize (aka bad mojo for jam).  Once the sugar grains are all dissolved bring the berries and sugar to a full, hard boil that cannot be stirred down.  Stir often for about 10-15 minutes with a long handled wooden spoon to ensure the jam does not stick or burn.
  4. To see if the jam has set, remove one of the chilled plates from the freezer and drizzle a little bit of the hot jam mixture onto the plate. Then tilt the plate to let the jam run.  If the jam firms up quickly and sort of crinkles on the top, then it is done.  If it does not firm up quickly, then let it continue to boil hard for a couple more minutes and test it again.  Keep going until you get the crinkles, then you are ready to fill.
  5. Once the jam is firming up well, remove it from the heat and skim off any foam. This can be set aside in a bowl to add to a nice piece of toast to celebrate your hard work.
  6. Fill and process your jars based on the manufacturer’s directions. I like to use wide mouthed 250 ml jars.
  7. After the jars are processed, set them aside to cool for 24 hours. Resist the urge to touch or move them during this time.  If any lids don’t seal properly, simply put those jars into the refrigerator and enjoy over the next couple of days.  The sealed jars can be stored for up to one year.

    Click here for a printable version of the Gooseberry Jam recipe.

  8. After the jars are cooled, clean them off and remove the rings. Label your jars clearly with the name of their contents and the date they were sealed.  Store the jars in a single layer in a dark, cool area.  Do not stack your jars on top of one another.  The reason you remove the rings is that if something went wrong with the canning and bad stuff is growing in there, the lid will lose its seal and pop open.  This food should be discarded and not eaten.  If you keep the rings on or stack something on top of your jars, then you cannot tell if a seal has popped.

20140725_182127

Gooseberry

The innocent little bush, just waiting for this years victims… I mean berry pickers…

Let the Games Begin…

Buckle up, Buttercup.  It’s time to get started.

The weather is warming.  We have intermittent sunshine and rain with some longer stretches of warm sunshine.  That means garden.  However, I don’t have my garden plot from the last two years.

Our landlord is consolidating her garden plots into one area, so my plot (actually my old plot) is a part of that.  So, this year we needed to find new place for our garden.  It ends up that this will be the rather oddly shaped southern border to the property that runs alongside the driveway.

IMG_9038 (2)

For now things look a bit… shall we say… odd.  Last October I already knew that I’d be losing my plot, but needed to be able to plant my garlic.  I was allowed to plant my glorious garlic (I’ll share the garlic story in a future post) in the raspberry patch that will separate the area with my old plot from my new plot.  This is the only time that you will ever (I hope) see me combine garlic with raspberries.  Just the thought gives me chills.

IMG_9036

What you see here is the beginning of the desodding process.  The one good side to the unbroken months of rain that we’ve had (I have to keep reminding myself that we live in a rain forest and therefore that requires copious amounts of rain) is that the sod is really lose and relatively easy to remove (as far as desodding goes).  I did a few rows on my own, but Dave did most of the heavy lifting (literally).  I did do most of the sod cutting, however.

I’ll show more of the changes to this brave new plot as gardening seasons progresses.  For now everything that has been moved from the old plot is in complete shock.  The sad looking limp chives will hopefully rebound soon.  Only one kale plant made the move well, and I’m hoping that the parsley comes along too.

Other than that on the back deck I have two containers struggling through the wetness.  One is my standard bin of mixed lettuces, and the other is half arugula and half of something that I’ve completely forgotten what it is.  It might be chives.  It might be that I actually only put seeds in half of the container with plans on putting something (of indeterminate origins) else in the other half.  Time will tell.  I hope.

In the meantime Dave and I spent a well deserved day post-desodding on the couch.  Little Man didn’t mind too badly since he got more TV than normal, but he did object to the amount of Mommy and Daddy TV rather than cartoons.  Such is life.  🙂
IMG_9039

A Waffle Kind of Morning

I think I’ve mentioned before that I might love breakfast just a little.  Or maybe a whole bunch.  I L-O-V-E breakfast, and will eat it for any meal of the day. While pancakes are a part of our regular weekend rotation of deliciousness, waffles are Little Man’s second favorite and frankly his preference could be bought depending on which one contains chocolate chips.  Those we save for super special days, however.

Like pancakes, when we first made the switch to gluten free-ish (Little Man’s issue is actually with not with gluten but with wheat, so we can use spelt flour that is low in gluten but not gluten free) I initially struggled with making a healthy-ish version that was also delicious.  One of the tricks I’ve found is that when dealing with low gluten or gluten free flours, a little bit of chia-meal or flax-meal goes a long way to creating the fluffy, bendable breakfast foods that we love.  Otherwise sometimes these gluten free or low gluten flours can be a bit friable or shatteringly powdery.  If you’ve eaten many things with straight up gf flour, hopefully you understand what I mean.  Not only does the chia or flax help make things bendable (gluten-like) It doesn’t hurt that they also add a great healthy boost to our beloved foods.  A boost that helps me think of these things as being healthy-ish… even with a healthy-ish dousing of maple syrup (the real deal please).

IMG_6027

Spelt Belgian Waffles

While this is “Belgian” in the North American style, these are not the waffles you’d find on the streets of Brussels. Beyond that, they are delicious! I make the entire batch at once, keeping them warm in the oven while cooking the rest. They are also great reheated from frozen. See the notes at the end for these instructions.

Ingredients:
2 cups spelt flour
¼ cup chia meal (see note)
4 tsp. baking powder
½ tsp. salt
2 cups milk (almond, coconut, cow, etc.)
½ cup canola oil
2 eggs, separated

Directions:

  1. Plug in and heat your Belgian style waffle maker. Turn your oven on to low.
  2. In a large bowl combine the spelt flour, chia meal, baking powder and salt. Whisk the dry ingredients together to blend well.

    IMG_6002

    The chia meal looks like a lovely pile of black pepper here, but it will all blend in I promise.

  3. In a large mixing cup or medium bowl combine the milk (almond milk is my favorite for these) and oil.

    IMG_6005

    I like to use a glass mixing cup large enough to hold all of my wet ingredients.  This one is a four cup measuring cup, so it’s perfect for this recipe.

  4. Get a small bowl for separating the eggs. Carefully break the eggs one at a time, dropping the whites into the clean bowl and the yolks into the milk and oil mixture. Set the whites aside for the moment.

    IMG_6003

    It’s hard to make a bowl of unbeaten egg whites look interesting.  Sigh…

  5. Use a fork or whisk to mix the wet ingredients together. Pour the wet into the dry and stir to combine. Set this aside.
    IMG_6008

    This doesn’t have to be a perfect emulsion, it just needs to be combined enough that there aren’t whole egg yolks floating around.

    IMG_6011

    Yup, the chia meal is still there peaking out at you, but these are whole grain waffles AND they taste fantastic.

  6. Using a hand mixer beat the egg whites to firm peaks. Fold the whipped egg whites gently into your waffle batter. There should still be a few streaks of white in your batter. This is what makes your waffles fluffy.
  7. Cook your waffles according to your waffle maker’s directions. For my waffle maker I use a ½ cup measuring cup to fill the griddle, close the lid and then flip the maker over. As the waffles finish cooking, I remove them from the waffle maker and put them in a single layer directly onto the rack of the oven. This recipe tends to make a total of 8 waffles that fills my oven in two rows of four.
  8. Any waffles that you don’t eat you can freeze. To reheat what I do is take one of the waffles out of the freezer bag, place it on a plate and drizzle about 1 tsp. of water over the waffle. Then I put this in the microwave for 10 seconds, and finally slide the waffle off of the plate into my toaster oven and toast it lightly. This gives me a warm, fluffy waffle that is crisply on the outside. If you don’t have a toaster oven, you can do the same thing with the broiler of your oven, but watch that waffle like a hawk. It can go from toasty to carbonized (aka burnt) in a second.

Note: Chia seeds lose their awesome oils quickly once ground, so try not to buy them pre-ground as chia meal. Instead, make your own by blitzing chia seeds in a coffee grinder or food processor. You can do the same with flax seeds to create a flax meal. Store any extra chia (or flax) meal in the freezer to keep it fresh. I generally use the black chia seeds since I can find a good organic version. There is also a white chia version that would work just as well.

P.S.

Yes, I just posted a photo of the inside of my oven on the internet.  Please don’t judge.  If you are my mother or mother-in-law, avert your eyes.

Click here for a printable version of the  Spelt Belgian Waffles recipe.


Rainy Day Cookie Picnic

Last week, as we got closer to the end of January, it felt like Little Man and I hadn’t been outside for any run around time in forever.  Having grown up in a semi-arid desert, I still tend to be a bit cat-like going outside in the rain.  Meaning it’s not my favorite thing.  This day, however, I had had enough.  It wasn’t raining (yet) so I bundled Little Man and myself up, grabbed his scooter and my bag full of empty egg cartons and headed off into the drizzle.

As we started off down the road, Little Man scooted alongside of me and commented that there was an awful lot of drizzle.  It had, in fact, turned from drizzle into a light rain.  By the time we’d made it up the hill to the house with the egg stand outside their fence, the light rain was a little less light.

Around this time Little Man started asking for a snack and I told him that we could have the cookies I’d brought with me for a snack when we got down the other side of the hill to the little lake.  He thought that was a great idea and declared that we would have a cookie picnic in the rain.  So empty egg cartons deposited, and new full egg cartons retrieved ($3/dozen for local farm fresh eggs… yup!  No need for eggs from the more… questionable sources of the mega stores for us), we were off down the road again.

Little Man imagined that we were going over a waterfall as we walked downhill, tracking whatever villain was supposedly rampant that day.  We had also picked up our neighbor’s friendly dog for the walk.  She often chaperoned us on our walks in the neighborhood, and Little Man considers her to be his dog.  Or at least a dog on loan when we go for walks.

Finally at the little lake, we sat down on a tree trunk bent into a perfect bench for the two of us, water soaking into our pants but neither of us cared.  Then cookies in hand, we sat on our sodden tree, gazed at the water falling into the lake, and chatted about camping thoughts for when the weather warms up a bit.  For this mom, it was a perfect rainy day cookie picnic.

20160127_115650 (2)

Our selfie reflection in the lake.  I love seeing Little Man’s Pooh Bear head and the dog paws on the dock as well.

20160127_115124 (2)

Our Rainy Day Cookie picnic.  A toque goes a long way to making it OK to sit out in the rain.  🙂

Breakfast Snack Cookies

Somewhere along the way we developed a morning routine of Little Man waking up and heading to the couch for a little TV, a drink of juice and a snack to tide him over until breakfast.  I don’t mind this window of quiet since it buys us a bit of time to start moving (and thinking).  Neither Dave nor I are particularly quick or quick witted first thing. What I’ve tried to do for these morning snacks, is find something that still registers as a treat for him, but that I can feel good about giving him to eat.  For Little Man, the greatest treat in the world is a cookie so treats in that form are generally a big hit.  Then I just wanted to make one that was as choc full of goodness (and tastiness) as I could come up with.  Enter the Oatmeal Peanut Butter Snack Cookie.

Once you move beyond the fact that they are delicious, they are also wheat-free, vegan and low FODMAP compliant, though none of those labels sound particularly tasty.  So if you’re going just for taste, ignore those last few disclaimers and get ready for a deliciously chewy cookie that you can feel good about feeding your family for breakfast or snack… or for treating yourself to as well.

With these, or pretty much any kind of cookies, I like to bake off a dozen right away for snacking and then freeze the rest in logs for slice and bake cookies.  For one thing that keeps me from eating an entire plate of cookies immediately since I don’t have a massive pile of cookies in front of me, but it also lets me vary things for Little Man in the mornings for snack time.  One of the things I read while researching Little Man’s dietary issues, is that especially if you have a picky eater, you should never serve your child the same thing two days in a row for breakfast.  Since Little Man is a picky eater and has the dietary issues, it felt like we were only feeding him two different foods for breakfast.  So now I try to have 4-5 breakfasts that I cycle through on any given week.  For us that’s often pancakes, eggs/toast/bacon, waffles, baked oatmeal, french toast, and a Dutch apple baby (baked pancake).  This is also why I like to keep homemade frozen pancakes, waffles, and bread in my freezer.  I make a batch of something and then freeze a good amount of it for use later in the week.  It’s not a perfect system, but it lets me rotate things through for Little Man and hopefully keeps his taste buds ready for new things to try.  FIngers crossed…

Oatmeal Peanut Butter Snack Cookies
I love that I can give these cookies to my son without feeling guilty about the ingredients, and the fact that he loves them because they’re delicious. Loaded with oats and peanut butter, these cookies give a good boost of fiber and protein, as well as a bit of chia goodness to round things out. I like to bake off a dozen and then freeze the rest of the dough in logs so I can bake more  whenever I want. Just add 5 minutes to the baking time if baking from frozen.

Ingredients:
2 tsp. chia meal (see note*)
2 tbsp. water (plus ½ cup for use later on)
¼ cup margarine, softened
1 cup creamy peanut butter
½ cup brown sugar
1 tsp. vanilla extract
3 cups rolled oats (not instant)
1 ¼ tsp. baking soda
1 cup semisweet chocolate chips

Directions:

  1. Preheat your oven to 350°, and line a baking sheet with parchment paper.
  2. In a small bowl combine the chia meal and the water, and let it sit for 5 minutes. This becomes your chia egg (aka egg replacement).
    IMG_3923

    All you need to make your own chia meal is a bag of chia seeds and a coffee/spice grinder.  This lets you create a healthier chia meal since your freshly ground meal retains more of the essential oils.  Store bought chia meal is much older and the oils have started to dissipate.

    IMG_3926

    It may not be pretty, but this peppery-gray goo (aka egg replacer) is full of nutrients, and helps wheat-free recipes hold together.

  3. In a large bowl or stand mixer, beat the margarine and peanut butter until fluffy. Add the chia egg, brown sugar and vanilla and beat until combined.
    IMG_3927

    Getting the margarine and peanut butter ready.  I use a good quality soy-free margarine.

    IMG_3928

    The beaters make fast work of blending my ingredients together, but you can do this by hand or with a stand mixer depending on your “tool” of choice.

    IMG_3930

    These are the last ingredients for using the beaters (or stand mixer).  From here on out you will want to use a spoon to combine the remaining ingredients.

    IMG_3931

    And here is your lovely batter, ready for the best parts… the oats and chocolate chips.

  4. Add the water, oats and baking soda, stirring by hand with a spoon or mixing on a lower speed in a stand mixer so the oats do not get too broken up.
    IMG_3933 (2)

    I like to stir this part by hand with a spoon so the oats do not get too broken up.

    IMG_3935

    Just missing the chocolate.

  5. Stir in the chocolate chips, and use two spoons to portion and drop tablespoon sized dough balls onto the parchment lined baking sheet, about 2 inches apart.
    IMG_3939

    This is Little Man’s favorite part since he needs to play Quality Inspector and make sure that the chocolate is fit for people to eat.

    IMG_3941

    Since this is an egg-free batter, the raw dough is safe for snacking on.  Little Man is not generally lucky enough for this, however, since I like to keep as much batter for cookies as possible.

    IMG_3943

    I did not use a scoop to form these cookies, just the old-fashioned method of two teaspoons.  If you do use a scoop, press down on the center a bit to flatten the cookies so that they cook through well.  This batter does not spread like some others do.

    IMG_3945

    More cookie love.

  6. Bake the cookies for 10 minutes, then allow to cool on the baking sheet for five minutes. Remove the cookies to a cooling rack and cool completely (of course, you should munch on a couple while they are still warm… just to make sure they are good). These cookies tend to be more fragile than cookies with lots of flour, but their taste makes up for any potential fragility.

    IMG_3955

    Since there is no flour in this recipe the cookies can be a bit fragile.  Let them sit on the tray for 5 minutes before transferring them to a rack to cool completely.

  7. The dough can also be rolled into a log inside plastic wrap and frozen for slice and bake cookies. When you want the cookies, simply pull out a log, unwrap the portion you want, slice off cookies and place them on a parchment paper lined baking sheet. Bake at 350° and check after 10 minutes. They may need a couple of minutes more since they are baking from frozen. Enjoy!
    IMG_3946

    I like to bake off a dozen of the cookies fresh, and then save the rest of the batter as freezer rolls to bake whenever I want them. So start with a sheet of plastic wrap and dump a portion of the batter onto the center of the plastic.

    IMG_3947

    Form the batter into a log-like shape using the sides of the plastic.

    IMG_3950

    Don’t feel that you have to be too precious about the thing and roll the perfect log.  No one is looking, so if your cookie log isn’t perfect it is no big deal.  And if anyone wants to critique your cookie log shape… perhaps they are not worthy of your cookies.  Just a thought.  😉

    IMG_3953

    Sometimes the cookie logs do not last long enough in the fridge or freezer for me to label them.

    IMG_3955

    The finished beauties.

IMG_3957 (2)

Now I just need a cup of tea and I will declare it snack time.


Note
: Chia seeds lose their awesome oils quickly once ground, so try not to buy them pre-ground as chia meal. Make your own chia meal by blitzing up chia seeds in a coffee grinder or food processor. You can also do the same with flax seeds, or make oat flour by blitzing up whole oats (not instant, please). Store any extra chia meal in the freezer to keep it fresh.

Click here for a printable version of the Oatmeal Peanut Butter Snack Cookies recipe.

On the Momentous Occasion of My First Use of a Grill

OK, so maybe for most of you this isn’t so momentous, but for me it was.  I’ve prepped things for the grill, read numerous recipes for grilling, and watched it done ad nauseum on television and on my own back deck.  I had not, however, actually used a grill.

After Dave’s brief description of where to turn on the propane, which burner to light first, how to stand back to preserve one’s eyebrows, and a few other tips that I’m sure were important but that I cannot for the life of me remember, it was time to use the grill.

So far both eyebrows are accounted for.

So far both eyebrows are accounted for.

The occasion for this momentous occurrence was the simple fact that it’s hot.  Beastly hot.  So hot that my jar of coconut oil that I’d left out on my counter liquified.  I don’t know if it’s quite “fry an egg on the side walk hot,” but that’s only because I refuse to sacrifice one of our awesome farm fresh eggs to such an experiment.  It’s so hot that the very thought of turning on my stove or (please forbid it) my oven made me cross and snappish.  So to the deck we went.

Little Man was highly amused and wanted to be sure that Daddy had given me permission to play with his grill.  Then he stood back, keeping his eyebrows at a safe distance, leaned onto the deck table crossing his ankles in the appearance of nonchalance (which in a four year old means that he was preparing to gather information in order to tattle on me to Daddy) and watched.

I wasn’t sure at first what I was going to grill, but then I remembered that I had some boneless pork chops defrosted in the fridge that needed to be used.  So after a few quick moments of internet searching for easy recipes, I stumbled on a Lemon Basil Marinated Pork Chop recipe that fit the bill.  It had only a couple ingredients, all of which I had at hand (the basil in my garden is trying to take over the world), and it seemed pretty forgiving to me.  Meaning that it hopefully would be very hard for me to really mess things up.

Then I opened the pack of pork chops and saw what I was faced with.  They had been hack sawed.  I don’t remember which store they came from, but as you can see in the accompanying pictures each chop was vastly different in size and thickness.  In short, they were a mess, but they were also destined to be dinner so on we went.  Marinade done.  Pork in marinade.  Rice on the stove.  Massive bowl of uneaten kale salad from a potluck bbq where everyone was too hot to cook so we all brought salads… on the table.  The moment had come.

Sorry for the blur.  Apparently I was excited when I was taking the picture with my phone.

Sorry for the blur. Apparently I was excited when I was taking the picture with my phone.

I successfully navigated the propane (after a few fruitless attempts to light the burner before I realized there was no gas) and burners, getting a good fire going and letting the grill heat.  Then on the chops went.  Nothing burst into flames, and I laughed at myself for how nerve wracking that one moment was.  In my head as I hovered with the pork in tongs over the grill I could hear my upstate New York friends saying to get on with it.  So on they went.  I had the best of intentions to take the smaller pieces off first but then just decided to give myself a pass and get the pork cooked.  Sorry, Dave.  I hope I didn’t let you down there, but a girl’s gotta do what a girl’s gotta do.

I tried to remember the trick for perfect grill marks from when I worked at the Blue Bayou, but no dice.  I'll keep practicing.

I tried to remember the trick for perfect grill marks from when I worked at the Blue Bayou, but no dice. I’ll keep practicing.

I did, at least, remember to let my greatly disparately sized chops rest before diving in.

I did, at least, remember to let my greatly disparately sized chops rest before diving in.

In the end, the pork was delicious.  And, yes, the smaller piece was over done, but Little Man didn’t mind and nothing was overly caramelized (aka burnt).  My kitchen stayed cool-ish, at least in the fact that I didn’t add much more heat to it with my cooking, and I’d gotten over the first fear of using the grill.  Now my summer dinner plans have opened up with the new addition of grilling to my repertoire.  I’m thinking of some grilled tandoori chicken soon perhaps.  We’ll see.

Ta da...

Ta da…

Some day I’ll have to tackle the charcoal bbq beast, but for now the quickness of propane is my new “go to” for the days when I just can’t face the stove.  I’ll just need a nice icy beverage in my hand next time.

Little Man and Pooh Bear decide that the pork was pretty good and that Mommy is allowed to grill again sometime.

Little Man and Pooh Bear decide that the pork was pretty good and that Mommy is allowed to grill again sometime.

Homemade Curry Powder

I love spice.  Love it!  The size of my spice cupboard is ridiculous, and that’s even after some serious culling both before and after we moved to Canada.  I’m looking forward to the day (hopefully not too distant in the future) when Little Man will start to enjoy food with any level of heat to it.  Until then, I still use spices heavily throughout my cooking, but limit myself to those that add flavor, not heat.

One of the drawbacks (and sources of great woe) of the low FODMAP diet has been in the total absence of onion and garlic in the spices we are allowed to cook with.  Garlic can be used as an infused oil, but all other forms are forbidden since they are a primary culprit of the bad gastric issues we are trying to avoid with Little Man.  This garlic and onion spice avoidance also means that just about every commercially available spice blend, even from the really good places, are also forbidden since they all contain some form (sometimes multiple forms) of dried garlic and/or onions.  Sigh…

The other day I finally hit my point of “enough!” when I was skimming through some online recipes and they all contained curry powder.  It just so happens that my spice cupboard holds multiple types of curry powder, all of which contain the forbidden items.  Argh!  As I glared at my spices it suddenly occured to me that I actually had all of the ingredietns that I needed to make a garlic- and onion-free (aka FODMAP friendly) curry powder.  I don’t know why it took me so long to realize this, but challenge accepted!

I do have to state here that there is absolutely nothing authentic about curry powder.  It’s basically an invention of colonialism as the British came back from their time in India and wanted to recreate the flavors of that incredible place.  Point of fact, this is also how Worcestershire Sauce was created, but that’s a different story.  The point here is to please not expect an authentic Indian cuisine experience from this spice blend, since it isn’t authentic.  It is, however, delicious.

Once you have the ground spices at hand, making the spice blend is literally as easy as stirring them up in a bowl and storing them in a tightly sealed jar in a dark, cool, place.  You can therefore tweak the recipe to give it the kind of flavor (or appearance) that you prefer, such as adding cayenne in place of where I use paprika.  Trust me, if I wasn’t doing this for Little Man specifically, I’d be using the cayenne as well.

I like to use this curry powder to toss with potatoes or yams for roasting in the oven along with a little olive oil, salt and pepper; or add it into quinoa or brown rice before boiling; or even mixing it into a simple vinaigrette for a punch of flavor in an acidic salad dressing.  Your only limitation in how to use this curry powder is your own imagination.  It goes great with just about anything.  And if you don’t need to follow a low FODMAP diet, by all means add a teaspoon or so of garlic and onion powder to your spice blend.  I’ll just have to vicariously live through your allium usage.

FODMAP Friendly Curry Powder
Yes, it is easier to buy an already blended spice mix from the store, but this version lets you adjust the heat level to your (or your family’s) preferences or dietary needs. My version creates a blend suitable for low FODMAP diet dishes, while giving you a fresher flavor than you’ll find from the store shelf. For the best curry powder, grind whole cumin and coriander seeds in a spice or coffee grinder. I use powdered here for quickness.

Ingredients:
2 tbsp. ground cumin
2 tbsp. ground coriander
2 tbsp. ground cardamom
2 tbsp. turmeric
2 tsp. paprika (or cayenne for more heat)
2 tsp. dry mustard powder
1 tsp. ground ginger
1 tsp. ground cinnamon

Directions:

  1. Combine the spices in a bowl, then pour into an air tight container.
    The spices for my homemade curry powder.

    The spices for my homemade curry powder.

    Stirring them together.

    Stirring them together.

    And viola, you are done.  My curry powder is not as yellow as some store brands.  You can make it more yellow if you want by adding more turmeric.  I like this deeper color, and the balance of flavors created here.

    And viola, you are done. My curry powder is not as yellow as some store brands. You can make it more yellow if you want by adding more turmeric. I like this deeper color, and the balance of flavors created here.

  2. Store in a cool, dark place. Use in any recipe that calls for curry powder. The curry powder can be used in a vinaigrette, tossed with potato or yam wedges for oven roasting, or rubbed onto a whole chicken before roasting. Enjoy!
Then just store the spice in a tight jar, like my tiny mason jar or any recycled jam or honey jar, and you are ready to go.

Then just store the spice in a tight jar, like my tiny mason jar or any recycled jam or honey jar, and you are ready to go.

Click here for a printable version of the FODMAP Friendly Curry Powder recipe.

These little jars can also make fantastic gifts.  Try putting a few together for a hostess gift, for a wedding shower, or around the holidays.

These little jars can also make fantastic gifts. Try putting a few together for a hostess gift, for a wedding shower, or around the holidays.

The Scent of My Morning

The morning is early, but you can feel the edge of the sunshine turning hot.  A quick shift in the breeze between cool dampness and dusty heat.  As I tromp out of one garden patch, moving the sprinkler to another bed, the scent of garlic perfumes the air. This is not the “aroma” of stale garlic from a cheap pizza joint, but fresh garlic growing inches from where I drag the hose and try to not stumble into the plants in my early morning haze.  In the interests of full disclosure it’s not really that early, but my level of functionality in the morning is… how to say this politely… slow.  Yet every morning as I move the sprinkler from that particular garden bed I catch the scent of garlic and think of it longingly.  I miss garlic.  I love garlic.  It’s early, I don’t plan on eating garlic right now, but it’s the true scent of the plant that makes me smile.  Every morning the scent of that garlic makes me think of food, which makes me laugh at the thought of a heavy garlic breakfast (not an impossibility in my household before the FODMAP… joy).  Then that thought always takes me to Turkey.

The first picked garlic head (with accoutrement) was gifted to me.  It was also the first time I'd actually seen the whole plant, including the curly scape growing out of the top.

The first picked garlic head (with accoutrement) was gifted to me. It was also the first time I’d actually seen the whole plant, including the curly scape growing out of the top.

Our landlord also let me harvest the remaining scapes from her patch.  Half of them ended up on our grill with a little olive oil, salt and pepper.  The other half are destined for some garlic scape pesto, but more on that later.

Our landlord also let me harvest the remaining scapes from her patch. Half of them ended up on our grill with a little olive oil, salt and pepper. The other half are destined for some garlic scape pesto, but more on that later.

I have no idea when I’ll get to return to Turkey or in what capacity, but the country and the people are lovely and I miss them both.  But in the mornings when I smell the garlic plants I reminds me of a less pleasant smell… at least at 4am… that of pancakes. Don’t tell my son that I wrote this, but at 4am on a dig site the last thing in the world I want to smell is cooking food, particularly pancakes.  For my first excavation in Turkey we had a dig chef who is arguably the best (and most fought over… literally) dig chef in the country.  Necmi is amazing.  Out of his love and caring for us, Necmi would prepare for us special food to start our day.  Pancakes.  The smell of those pancakes at o’dark hundred hour made me nauseous, but out of love for Necmi we would all try to choke one or two down.  Then around 8:30am-ish, after we’d been working at the excavation site for a few hours, we would stop work for second breakfast (the life of an archaeologist in the field does have some parallels to how hobbits eat) we would wish we had his pancakes.

Now I just need to figure out how to cure this glorious bulb.

Now I just need to figure out how to cure this glorious bulb.

But back to the garlic.  This is one of those crops that I’d never actually seen in “the wild”  before moving to Vancouver Island.  I had a good working knowledge of what the plant looked like, having cooked with garlic bulbs all of my adult life, but that doesn’t prepare you for the reality of the three foot high stalks, the buried/hidden bulbs underground (are they growing down there?), or the Seussian curly scapes that signal the garlic is almost ready to harvest.  Nor does it prepare you for the realities of how to actually harvest the thing.  Fresh garlic needs to cure or dry before it is used, but these are seriously thick stalks.  Can we even braid them into some form of bulbous hair-like creation?  And if so, where do we put them.  And if we can’t braid them, where do we store them?  Fresh garlic is like a gremlin, don’t get it wet.

My glorious harvest of scapes.

My glorious harvest of scapes.

The bulk of this garlic-based malaise is actually not mine to carry, but my landlord’s.  We did not plant garlic because I figured it was a moot point since we couldn’t eat it due to Little Man’s FODMAP restrictions.  That was… shall we say… shortsighted of me.  SInce then I’ve found ways to use garlic (like in garlic infused oils) in cooking for LIttle Man, and there is the fact that Dave and I can eat garlic even if our son cannot.  While the low FODMAP thing is working great for Little Man, my weight has gone up, my nails shatter just by looking at them cross eyed, and I’ve started coveting my neighbors garlic patch.  Luckily our neighbors are kind, sharing people, and I have some fresh garlic curing downstairs as we speak with the promise of more garlic later in the season for us to plant for next year.  The world is a kinder place because of it.

Garlic Scapes

The Sheep Are Out Again… Wait, What?

The very first meal that we ate in this house inspired the name of this blog, the sheep are out.  I won’t retell the story here, but you can read about it in the first post that is linked here.

Whadda ya lookin' at?  Can we get back to our snack now?

Whadda ya lookin’ at? Can we get back to our snack now?

Since that time the sheep have gotten out a couple more times, generally their short-lived freedom being spent nibbling and pooping (lots of pooping) in the garden.  There’s also been a loose horse in the front yard, munching by the basketball hoop, as well as various and a sundry other wildlife.

Running with the bulls… I mean the sheep…

So when Dave came bursting into the living room last night after just having put Little Man to bed and said that I needed to look outside, I flew to the front door.  Outside I was greeted by a group of sheep munching away around Little Man’s sand box.  They looked a bit chagrined that their late night snack was being interrupted.  Luckily Dave was doing the sheep herding and steered them down the driveway rather than the shorter distance through the garden (which I likely would have done without thinking about the consequences) since it would have been destroyed.

Wait for me!

I have to say that Dave is becoming a quite proficient with his sheep herding, much better than our first night here back in 2013.  Hopefully the sheep don’t take this as a challenge to up their game.  Until then, the sheep were out, but are now… noisily… back in their pens.